
Finding all puzzle piece locations in We Were Here Tomorrow requires exploring every corner of the facility from the main hub to the balcony. These 12 hidden items slot directly into the unfinished jigsaw puzzle waiting in the Common Room. This walkthrough maps out every single hiding spot so you can grab them all without wasting hours retreading your steps.
Coordinating with your partner makes sweeping these areas much faster since a few pieces sit near platform hazards or require specific vantage points. Keep your eyes peeled on laboratory counters and elevated boxes as you progress through each chapter together.
Before diving into the search, make sure you and your partner are communicating clearly about room transitions and lever activations. Grab a notepad if you like keeping track of your route, though following this exact path prevents you from missing anything major.
We Were Here Tomorrow Walkthrough
Cable Puzzle Solution
All 12 Puzzle Piece Locations
Tracking down all 12 collectibles involves checking tables, supply cabinets, laboratory equipment, and various elevated ledges. The breakdown below lists every spot in chronological order so you can sweep the facility efficiently.
Common Room – Puzzle Pieces 1-4
Puzzle Pieces #1, #2, and #3
I found the first three puzzle pieces in the Common Room, which I also call the Hub. They’re easy to spot because all three are lying underneath the small table with the unfinished jigsaw puzzle on top.
Your hunt starts right in the Common Room , also known as the hub. The first three items are tucked away in plain sight underneath the small table holding the jigsaw puzzle frame.
Puzzle Piece 4
Stick around the Common Room for the fourth item. Head over to the dining table loaded with cakes, where you will find the piece resting next to a notepad and test tubes.
Research & Development – Puzzle Pieces 5-6
Puzzle Piece 5
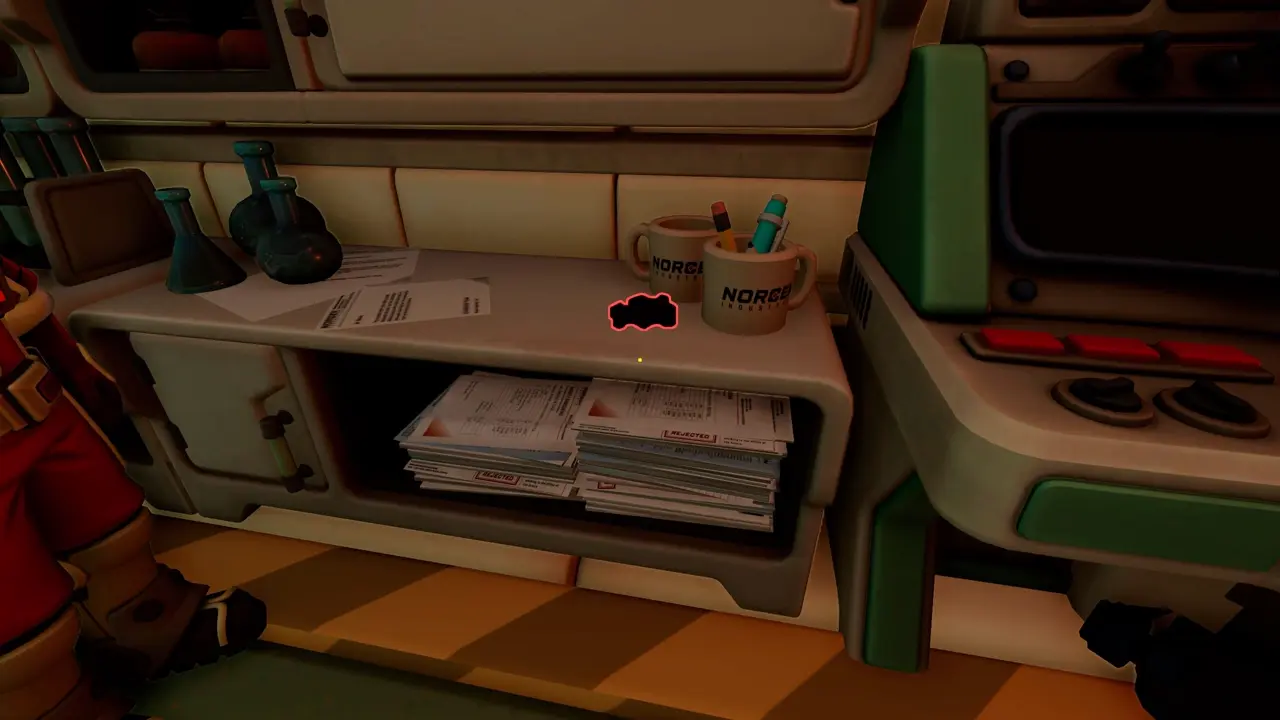
Venture into the Research & Development sector, which is the two-story chamber featuring dual keycard slots that eventually grants access to the Prototype Room. Stay on the ground floor and search the laboratory counter positioned to the right of the main entrance to spot item number five.
Puzzle Piece 6
Climb the stairs to the second level of the same Research & Development area. Inspect the small cabinet sitting immediately to the left of the staircase to retrieve item number six.
Prototype Room – Puzzle Pieces 7-8
Puzzle Piece 7
Make your way into the Prototype Room and look near the left ceiling fan. You can ride the elevator up to the first platform or use parkour to scale the structure.
The player holding the hook can grab this item directly without turning off the machinery. Alternatively, your partner using the cube can block the rotating blades, though it is entirely optional.
Prototype Room Puzzle Piece 7
Puzzle Piece 8
Finish the prototype tutorial sequence and pull the cooperative lever alongside your teammate to open the next door. Step through the threshold and look at the table sitting immediately to your right.
We Were Here Tomorrow prototype room table puzzle piece location
Return to the Common Room – Puzzle Piece 9
Puzzle Piece 9
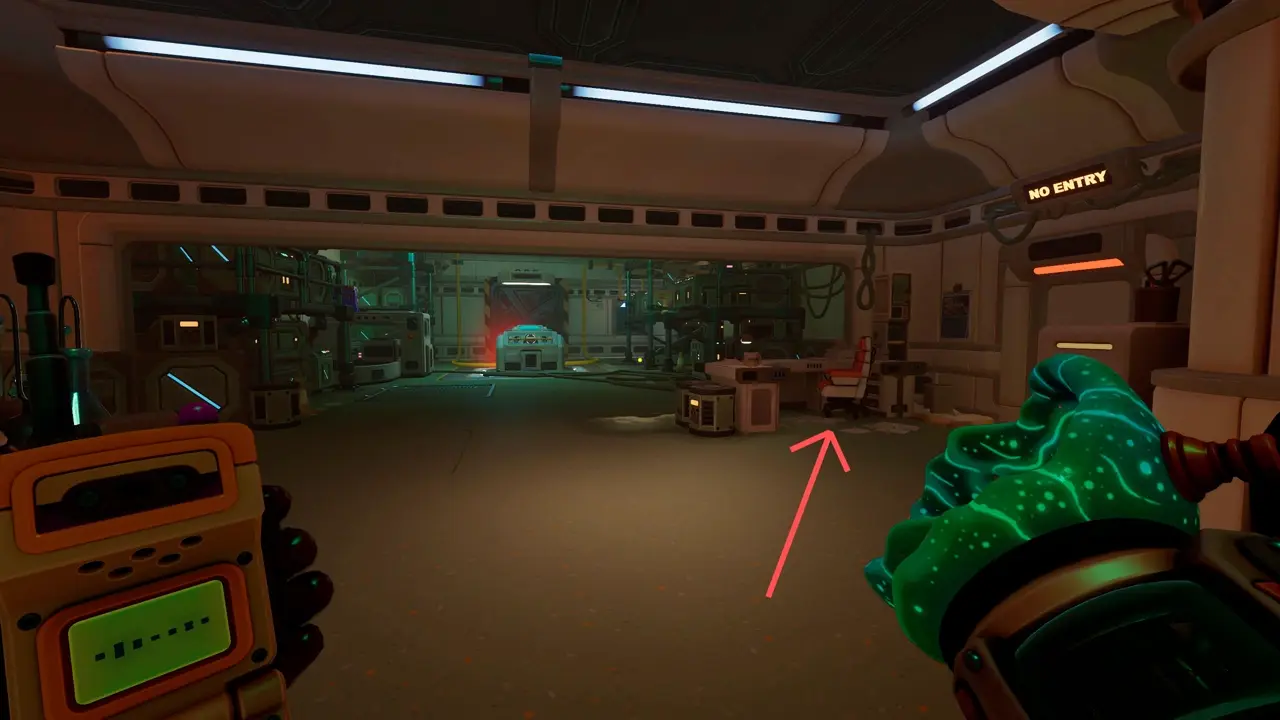
Trace your steps back toward the central hub by taking the left door from the previous table and heading up the stairs. Keep an eye out for a stack of crates featuring a yellow hard hat resting on top.
We Were Here Tomorrow hard hat crates puzzle piece location
Room Before the Funicular – Puzzle Piece 10
Puzzle Piece 10
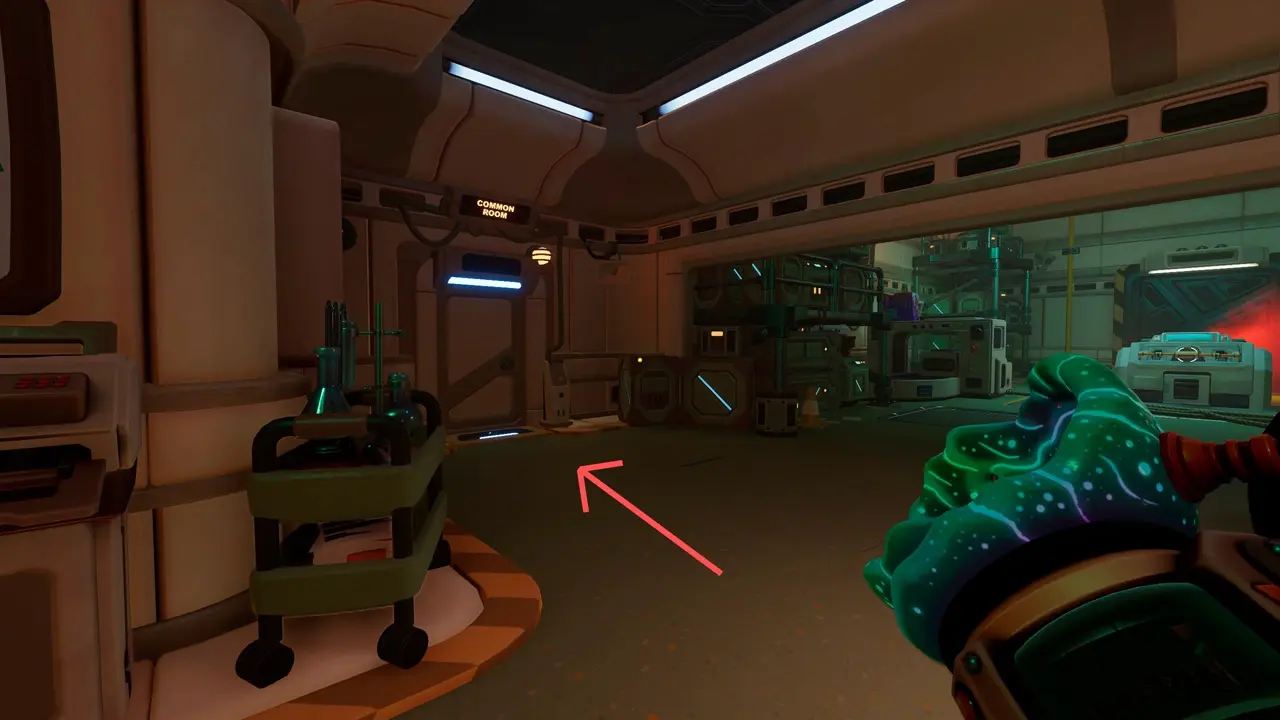
Pro tip: Avoid pulling the double-handled central lever in this chamber. Activating it seals the doorway leading back to the hub, cutting off access to your unfinished jigsaw puzzle.
Ascend to the second floor using the climbing route marked in the area. Look toward the locked Control Room door where a computer terminal sits, and pick up item number ten resting right on top of the console.
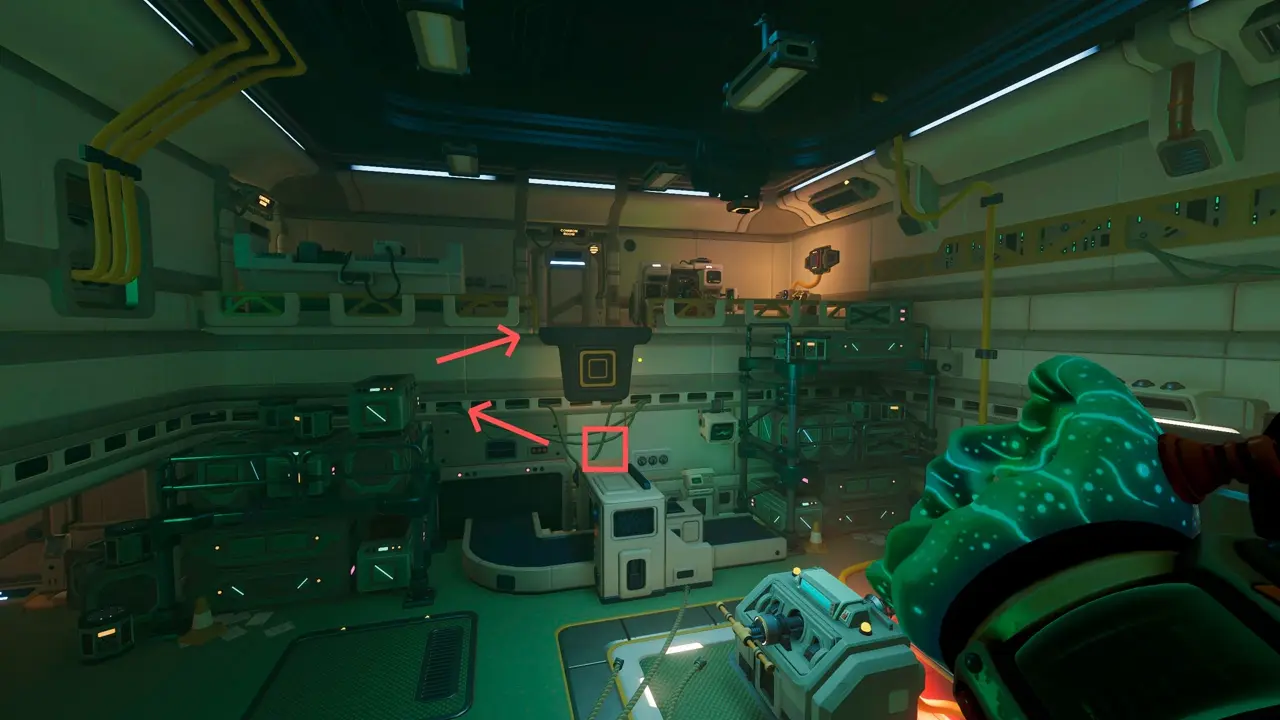
Common Room Balcony – Puzzle Pieces 11-12
Puzzle Piece 11
Remain on the upper level after grabbing the previous item and walk through the exit leading out onto the balcony overlooking the main hub. Search the small cabinet positioned right next to the computer terminal on the right side.
After collecting piece #10, I stayed on the same floor and went through the door leading onto the Common Room balcony.
Puzzle Piece 12
Stay on the balcony and pivot to face back toward the interior of the main hall. Look up toward the overhead ceiling lights to spot the final collectible tucked away out of ordinary reach.
We Were Here Tomorrow balcony ceiling lights final puzzle piece
The piece has already been collected in the screenshot below, but its exact position is marked so I can still identify where to look.
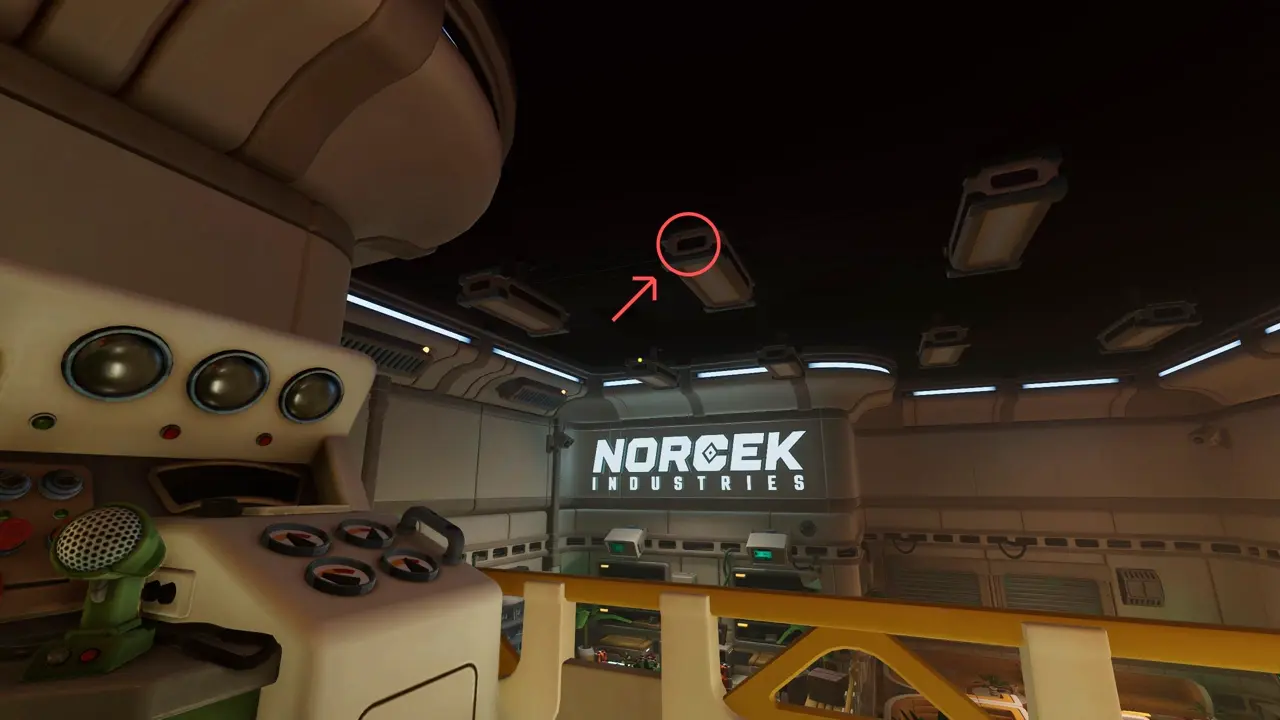
What Happens After Collecting All 12 Puzzle Pieces?
Assembling all 12 fragments into the main frame does not unlock any achievements or trophies. The developers instead included a neat hidden Easter egg that returning fans of the franchise will instantly recognize.
Tracking down every single collectible takes roughly nine to ten hours of thorough exploration. Hopefully, this guide saves you some serious backtracking so you can enjoy the puzzles with your partner.
Even without an achievement to earn, the search took us around 9–10 hours. I hope these locations help you find every piece without spending nearly as much time looking for them.