
We Were Here Tomorrow is a cooperative puzzle adventure where you and a partner communicate to solve puzzles and explore together. Along the way, you can also hunt for 12 collectible jigsaw pieces. These smaller discoveries give you another reason to check the furniture and equipment around you.
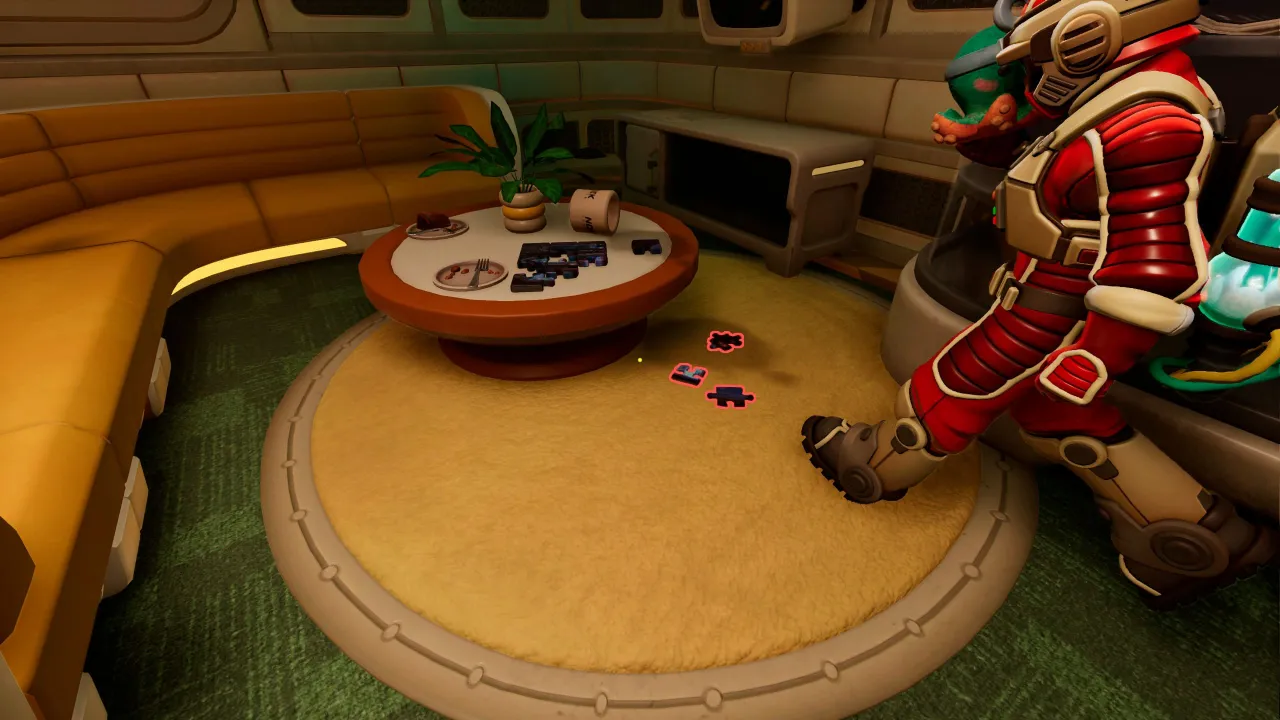
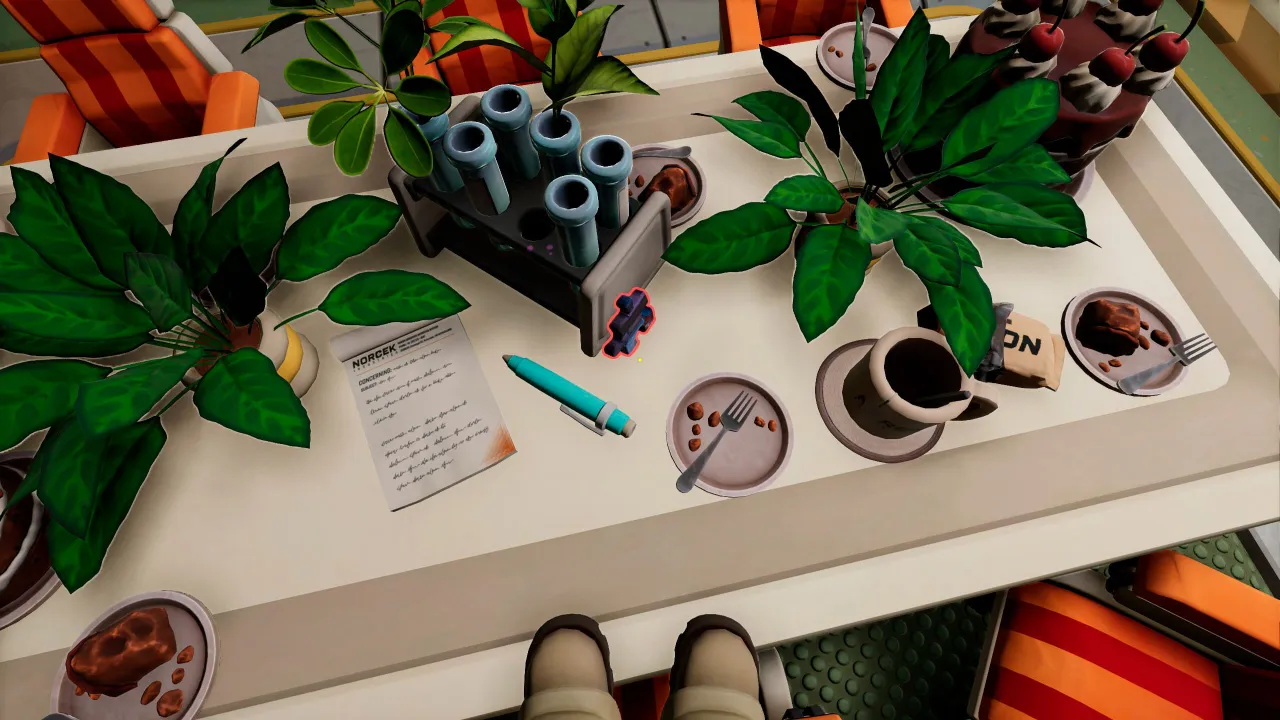
If you’re checking we were here tomorrow jigsaw locations, the Common Room gives you an easy starting point: pieces sit right beneath the little table holding a half-finished puzzle. Another rests on the dining table with cakes, beside test tubes and a notepad. Beyond those obvious collectible locations, watch for Research & Development’s two-story room with two key card slots, which later leads to the Prototype room.
You’ll get locations for all 12 jigsaw pieces, starting with the first three together in the Common Room, also called the Hub. Use landmarks such as the cake-covered dining table and Research & Development’s two key card slots to identify the rooms you’re looking for.
Pieces #1–3
Common Room
(also called the Hub here)
These are hard to miss.
You’ll find them right under the little table with the half-finished puzzle on top.
Piece #4
Common Room (the Hub)
Look on the dining table with the cakes. The piece is next to the test tubes and a notepad.
Piece #5
Research & Development
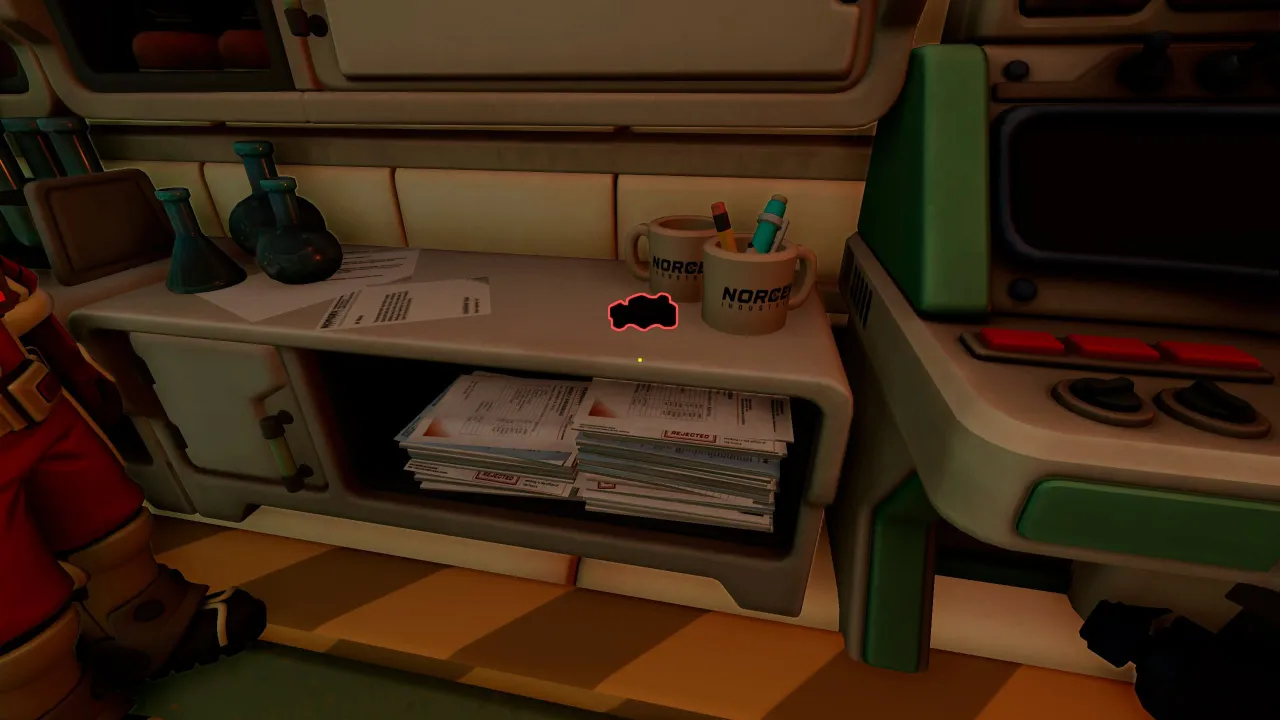
You’re looking for the two-story room with two key card slots. Later on, it leads to the “Prototype” room.
Head into the area under the second floor. You’ll find the piece on the laboratory counter to the right of the entrance.
Piece #6
Research & Development
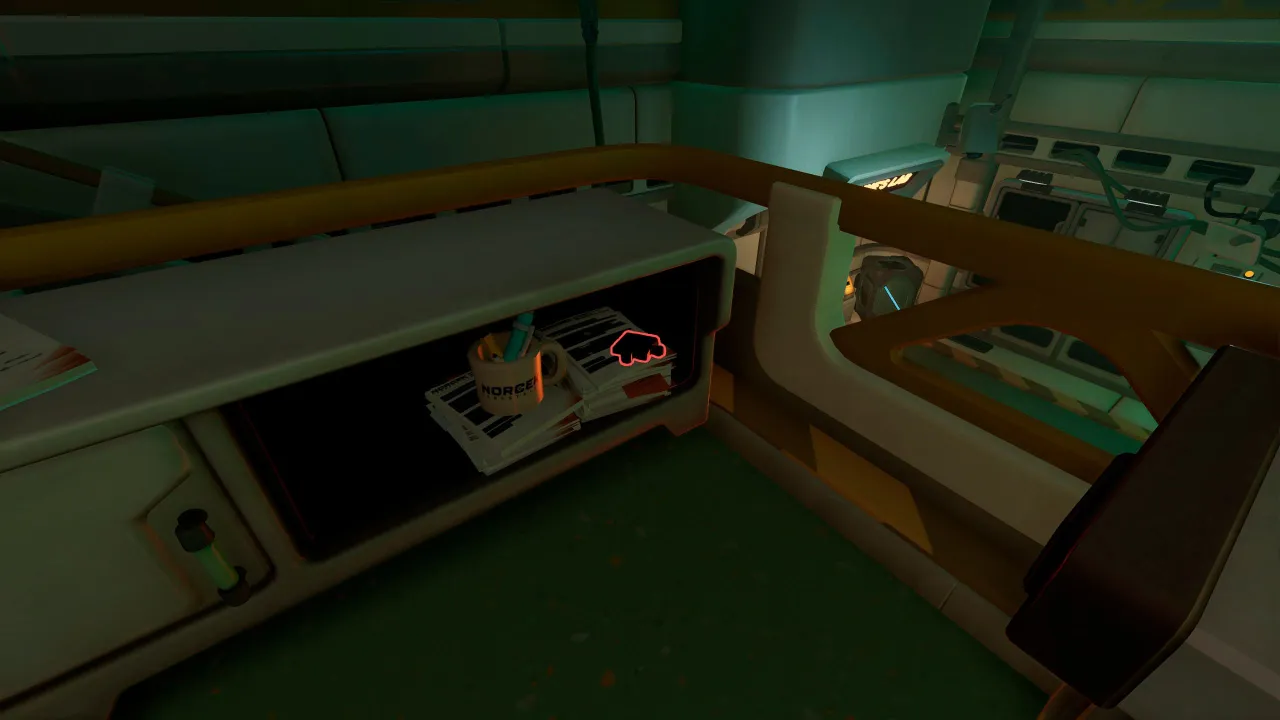
Head to the second floor and check inside the little cabinet just to the left of the stairs.
Piece #7
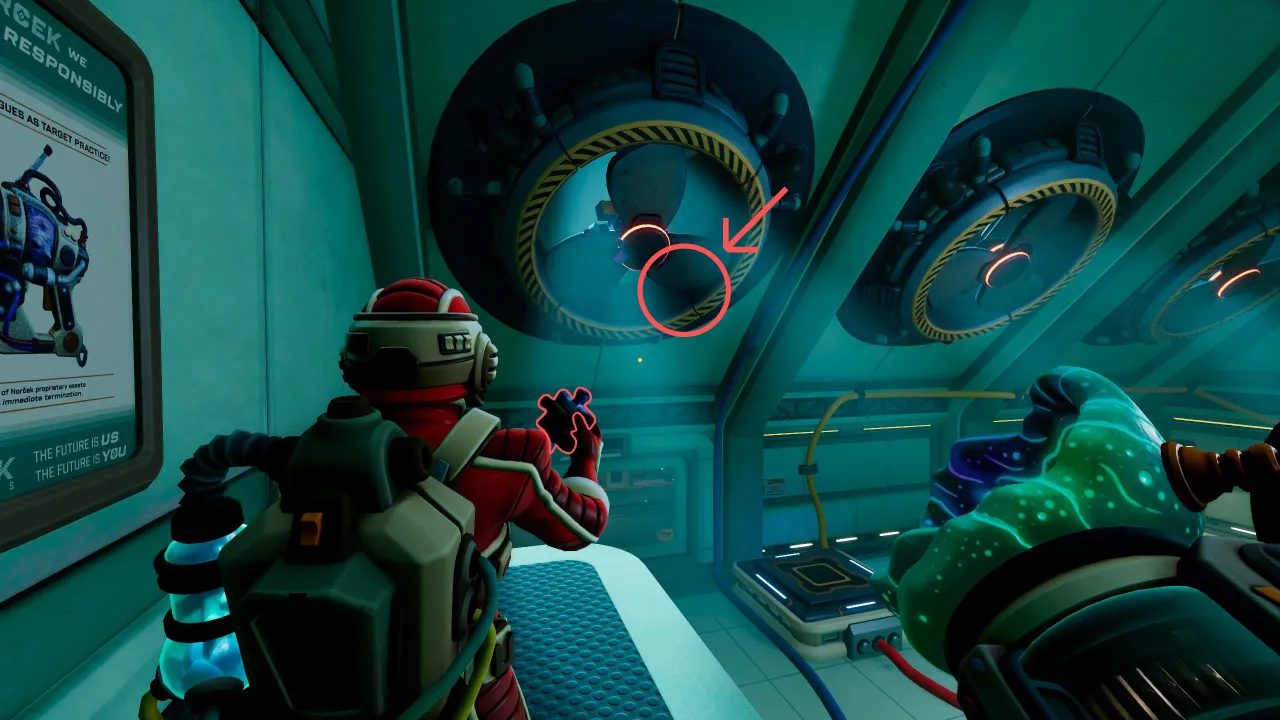
Prototype Room
Look at the left ceiling fan.
Take the elevator to the first platform, or parkour your way up if you prefer. You don’t need to stop the fan—the player with the hook can snag the piece directly.
The cube player can gum up the fan first if you’d like, but it’s not required.
Piece #8
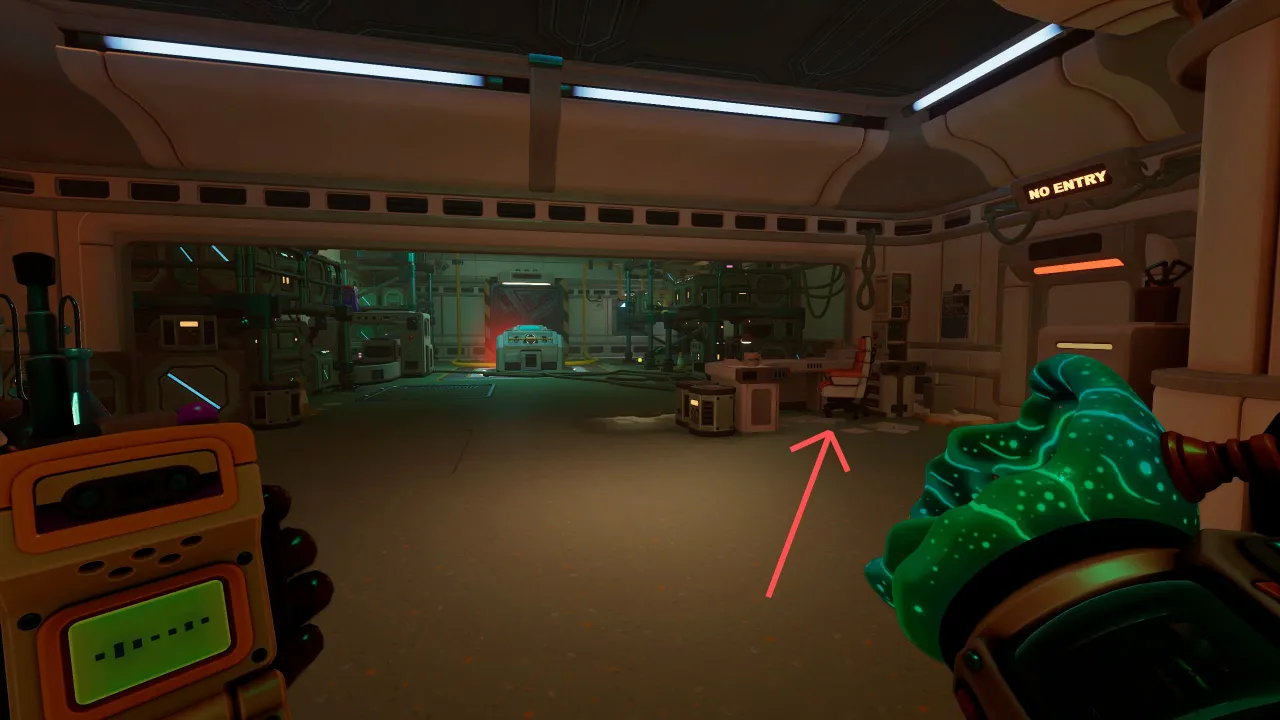
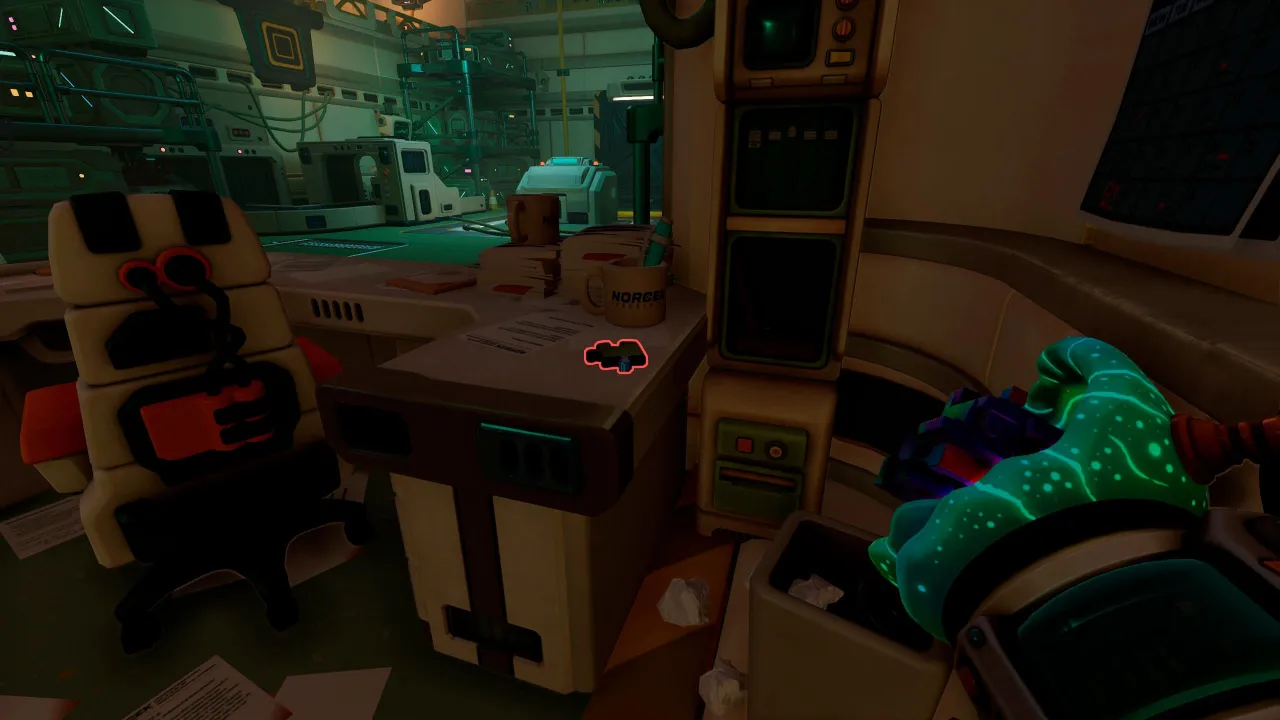
After finishing the Prototype tutorial, enter the small room and pull the lever together. Then head out through the door.
You’ll find the piece on the table to the right of the entrance.
Piece #9
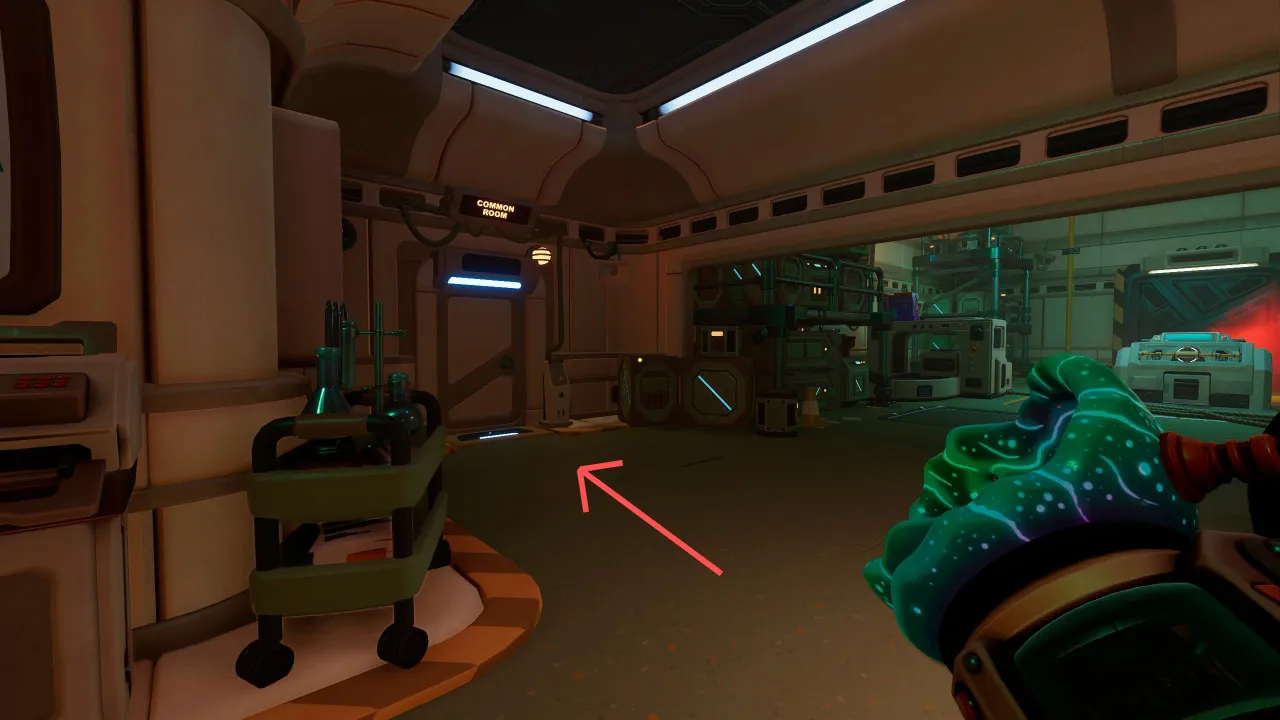
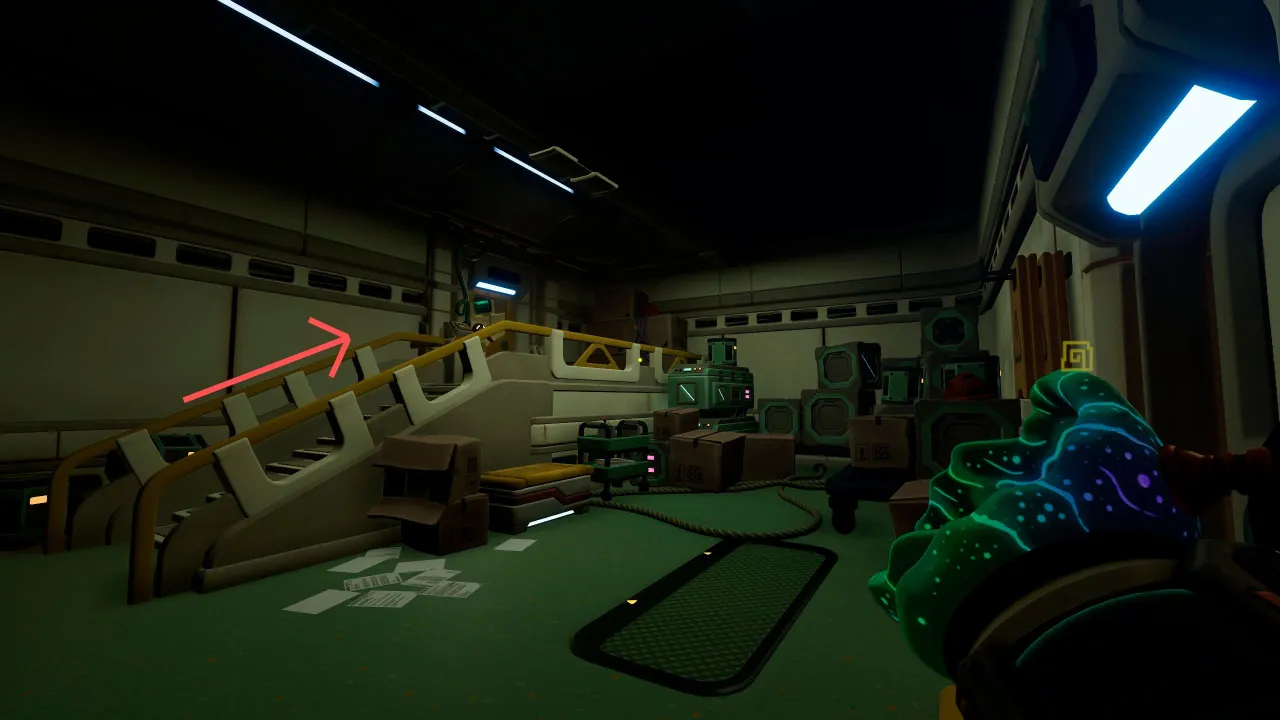
Common Room (on the Way Back to the Hub)
Go through the door to the left of the table where you found piece #8, then climb the stairs. You’ll see boxes ahead; look for the one with a hard hat on it. The piece is right next to the hat.
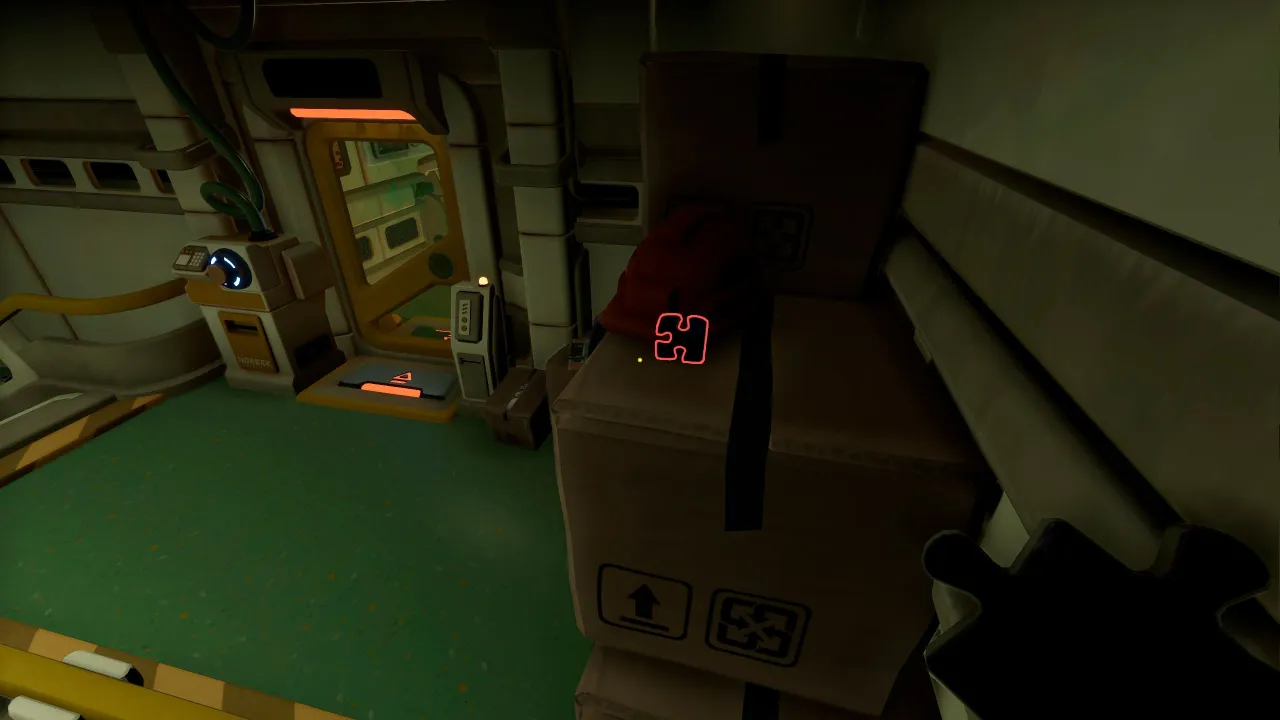
Piece #10
The Room Before the Funicular
Leave This Lever Alone
DO NOT pull the dual-handled lever in the center of the room. If you do, the door to the Hub / Common Room, where the jigsaw puzzle is, will be locked!
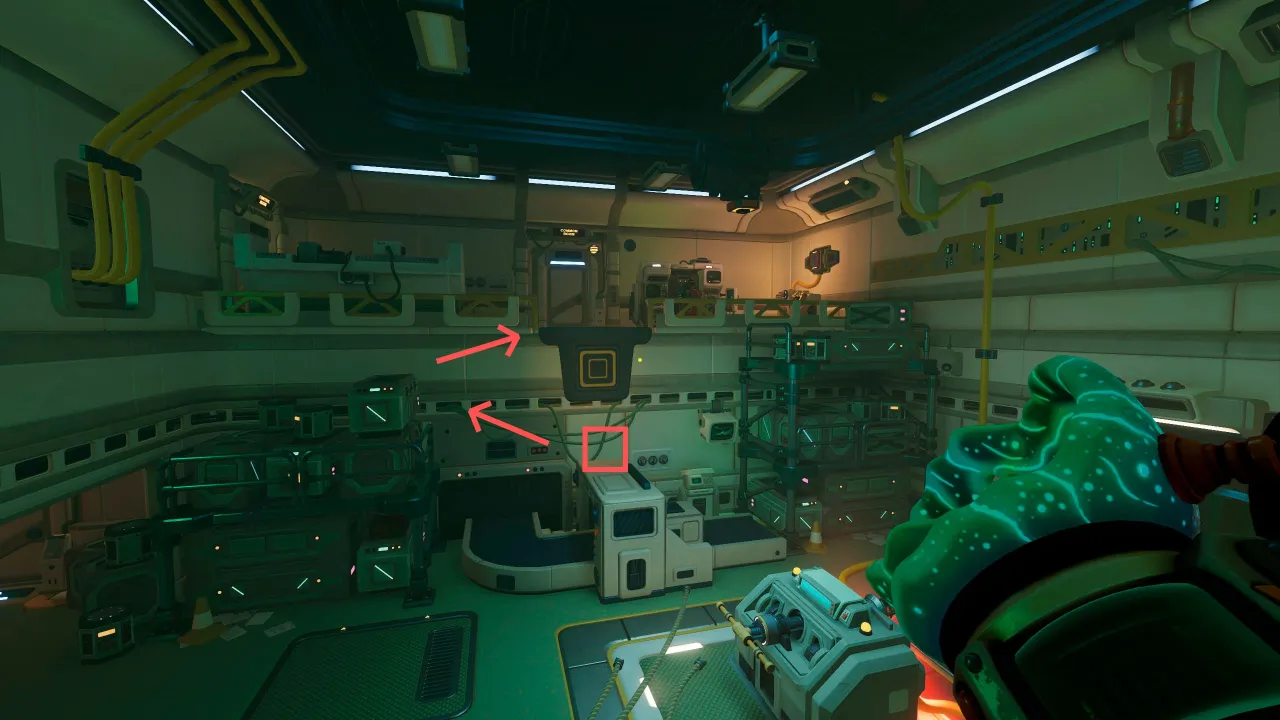
Head up to the second floor using the route shown in the screenshot.
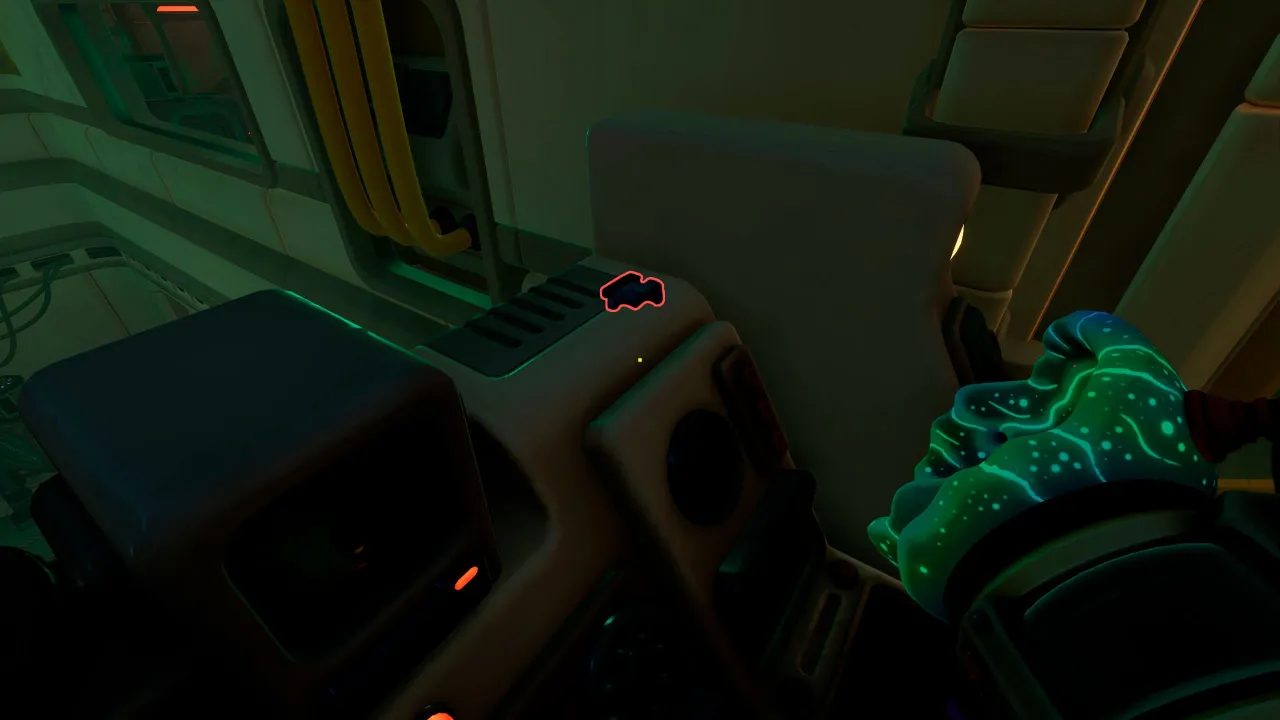
Look left for a computer panel in front of the locked Control Room. Your next piece is sitting on top of it.
Piece #11
Common Room (The Hub Balcony)
Go through the door on the same floor as piece #10 to reach the balcony.
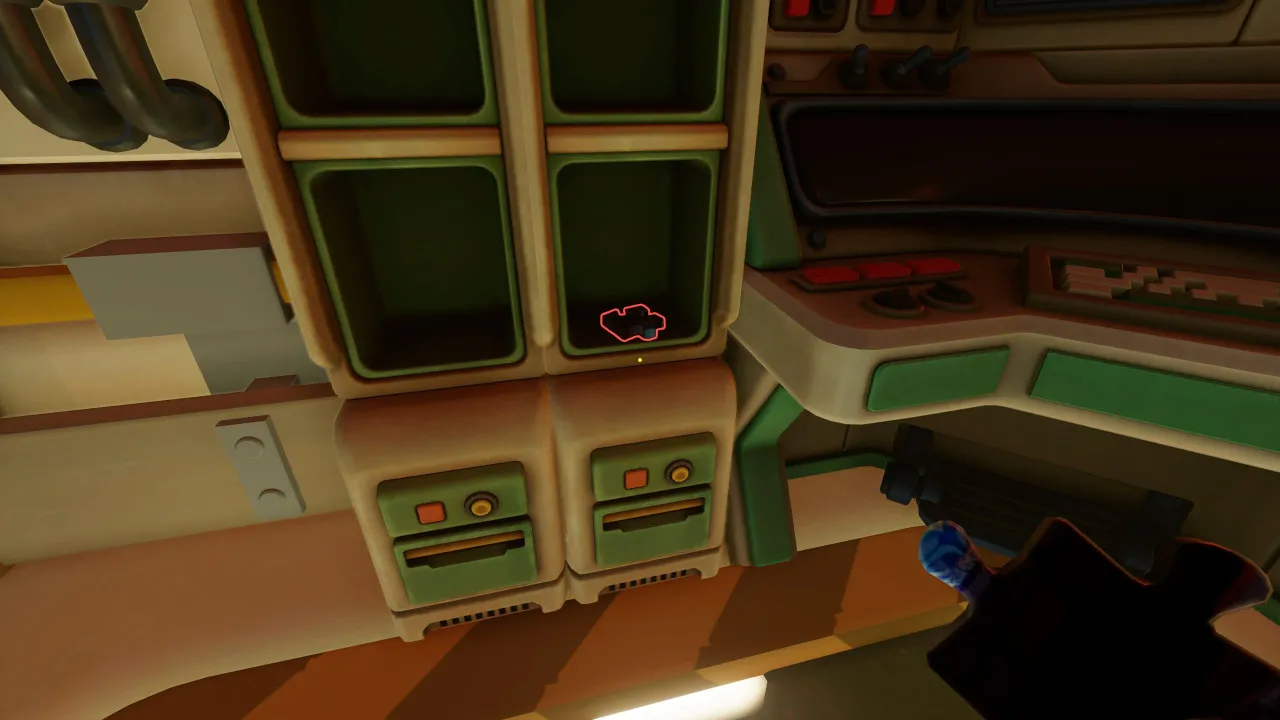
On your right, you’ll see a computer with a small cabinet to its left. Grab the piece there, then stay right where you are.
Piece #12
Common Room (The Hub Balcony)
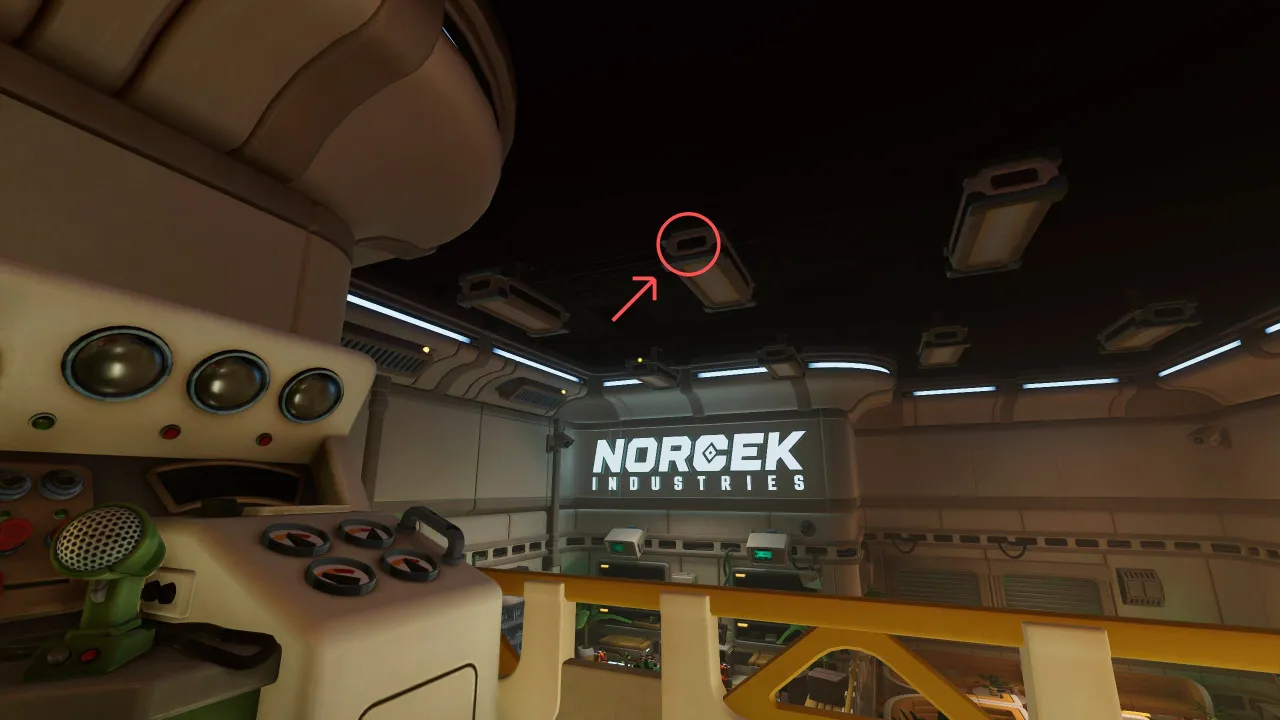
Face the Common Room, then look up at the ceiling lights to grab your last piece.
The screenshot was taken after the piece was collected, but its exact spot is marked.
Conclusion
You don’t get an achievement for completing the puzzle, so don’t expect one to pop up when you finish it.
Still, if you’ve been playing the series for a while, you might enjoy the little “present” the developers left for you when you finish the puzzle.
Good luck finding your last few pieces! Before you leave the Hub, check beneath the little table with the half-finished puzzle—not just the tabletop.