
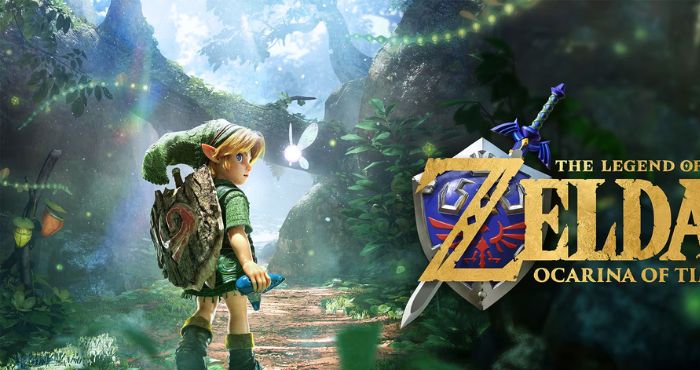
Ganondorf’s Castle is the final dungeon in The Legend of Zelda Ocarina of Time, and it puts nearly everything you’ve learned throughout the game to the test. You’ll need to solve puzzles, defeat powerful enemies, and use several of your key items to break through the castle’s barriers before you can face Ganondorf.
In this walkthrough, I’ll take you through all six Sage Trials, explain how to reach Ganondorf’s Tower, and share tips for defeating both Ganondorf and his true form, Ganon. I’ll also cover the escape sequence so you can finish the adventure without missing a step.
The Legend of Zelda Ocarina of Time Ganondorf’s Castle 100% Walkthrough
Unlike the other dungeons, Ganondorf’s Castle lets you tackle most of its trials in any order. Your goal is to clear six trials connected to the Sages and destroy the corrupted cores inside them.
Two trials are blocked by massive black-and-gold pillars. You’ll need the Golden Gauntlets, which you find during the Shadow Trial, to move these obstacles.
For a straightforward route, start with the Forest Trial and continue counterclockwise through the castle.
Forest Sage Trial
Enter the door to the right of the main chamber, beneath the Forest Sage crest.
- Defeat the Wolfos in the first room.
- Equip Din’s Fire and stand among the four unlit floor torches. Use the spell to light them, then shoot an arrow at the final torch above the locked door.
- In the next room, collect all five silver diamonds.
- Use the Song of Time to make a Time Block appear beneath the nearby diamond.
- Wait for the fan to stop blowing, then use the Hover Boots to cross to the platform between the two fans on the left.
- Reflect the Beamos laser with your Mirror Shield, then jump across the platforms to collect the next diamond.
- Grab the diamond on the lower platform near the door.
- Wait for the back-left fan to stop, then step on the switch and use the Hookshot to reach the fourth diamond.
- Collect the final diamond beside the locked door to open it.
In the next room, shoot the corrupted core with a Light Arrow. Return to the main chamber and head to the Water Sage Trial.
Water Sage Trial
This trial combines combat with an ice-block puzzle.
- Use the Megaton Hammer to defeat the two Freezards.
- Avoid the chest in the back-left corner; it’s a trap. The chest on the right contains Bombchus.
- Collect Blue Fire from the source in the middle of the room and use it to melt the red ice blocking your path.
- Push the farthest ice block to the right until it hits the ice rock, then push it into the matching hole in the floor.
- Move the next block across the hole you filled and push it toward the northern rock.
- Line up the block with the raised area containing red crystals, then melt the crystals to reveal a hammer switch.
- Hit the switch with the Megaton Hammer to unlock the door.
Use a Light Arrow on the corrupted core in the next room, then return to the main chamber and enter the Shadow Sage Trial.
Shadow Sage Trial
The Shadow Trial is all about timing and using your equipment carefully.
- Shoot an arrow through the flames at the unlit torch on the right side of the first room.
- Cross the platforms that rise from the abyss and open the chest on the left for five arrows.
- Defeat the Green Bubbles, then approach the platform with the Like Like.
- Kill the Like Like and use the Hover Boots to cross the broken bridge.
- Equip the Lens of Truth to reveal a hidden path leading to a switch.
- Step on the switch to spawn a chest containing the Golden Gauntlets.
With the Golden Gauntlets, you can now lift the massive black-and-gold pillars. Throw the nearby pillar aside, use the Lens of Truth to reveal the floating platform, and cross the gap with the Hover Boots.
Destroy the corrupted core with a Light Arrow and return to the main chamber.
Get the Great Fairy’s Defense Upgrade
Before continuing, I recommend leaving the castle and returning across the bridge of light.
Once you’re outside, head left and use the Golden Gauntlets to move the large black-and-gold pillar. This reveals an entrance to a Great Fairy Fountain.
Pay the Great Fairy 500 Rupees to receive a defensive upgrade that permanently halves the damage you take. It’s well worth getting before the final battles.
Return to the castle and move the pillar blocking the Fire Sage Trial.
Fire Sage Trial
Equip the Goron Tunic before entering, as the room is filled with intense heat. You’ll need to collect five silver diamonds while most of the platforms sink when you stand on them.
- Grab the diamond on the platform to your right.
- Move to the far-left platform beside the rotating fire pillar and collect the next diamond.
- Head to the platform with the black-and-gold pillar. It won’t sink, so use it as a safe spot.
- Lift and throw the pillar at the stalactite.
- Collect the diamond that was underneath the pillar.
- Defeat the Fire Slug with the Megaton Hammer and collect the diamond on its platform.
- Grab the final diamond from the fallen stalactite.
Once the door opens, use the Longshot to reach it. Enter the next room and destroy the corrupted core with a Light Arrow.
Return to the main chamber and head into the Light Sage Trial.
Light Sage Trial
Use the Lens of Truth as soon as you enter. A hidden Skulltula will drop from the ceiling. Defeat it and the three Keese on the walls to unlock the door and spawn a chest with Rupees.
Avoid the trapped chests in the room, including the middle chest on the left and the front-right and back-right chests.
In the next room:
- Use the Lens of Truth to reveal a small chest on the left.
- Open it to get a Small Key.
- Play Zelda’s Lullaby on the Triforce symbol if you want an extra Green Rupee.
- Enter the room with two boulders rolling around a central pillar.
- Collect the five silver diamonds around the pillar and in the wall alcoves.
- Use the Longshot on the ceiling grapple point to reach the final diamond.
In the last room, defeat the Wallmaster when it drops down. Use the Lens of Truth to reveal the fake wall hiding the corrupted core, then destroy it with a Light Arrow.
Spirit Sage Trial
This is one of the easier trials, but you’ll still need to use your items carefully.
- Collect the five silver diamonds around the room.
- Use the Megaton Hammer to destroy the Armos statue in the back-left corner.
- Move other Armos statues as needed to shift the spike traps and reach the diamonds.
- Use the Longshot to collect the central diamond.
Go through the unlocked door and defeat the Fire Slugs to spawn a chest containing a Business Scrub seed.
Next, line yourself up with the crystal behind the fence. Launch a Bombchu toward it so it crawls through the opening near the ceiling and explodes beside the crystal.
In the next room, use a Fire Arrow to burn away the webs on the ceiling. Direct the sunlight with your Mirror Shield onto the Sun Switch to the left of the entrance. Avoid shining light on the other switches, as they summon enemies.
Enter the final room and destroy the corrupted core with a Light Arrow. This will remove the barrier around Ganondorf’s Tower.
Prepare Before Climbing the Tower
Before heading up, I recommend visiting the hidden Fairy Fountain beneath the arch near the tower entrance.
Try to bring:
- At least two Fairies
- One Red Potion
- One Green Potion
- One Blue Potion
Having a good supply of health and magic will make the upcoming fights much easier.
Climb Ganondorf’s Tower
The tower is a series of combat encounters. Try to conserve your health and magic, since you’ll need them for Ganondorf.
First Floor: Dinolfos
Defeat the two Dinolfos in the first room. Play defensively and wait for them to finish their jump attacks before striking.
Second Floor: Stalfos
The next room contains two Stalfos. Keep both enemies in view so one can’t sneak up behind you.
As with the Dinolfos, wait until they finish their jump slash before attacking.
Third Floor: Iron Knuckles
The final room contains two Iron Knuckles sitting on thrones. You can choose when to start the fight.
I recommend equipping the Biggoron Sword and Bombchus.
- Attack one Iron Knuckle to wake it up.
- Keep your distance and use Bombchus to damage it.
- Once its armor breaks, the second Iron Knuckle will awaken.
- Quickly attack the unarmored enemy with the Biggoron Sword before it can become a threat.
If you don’t have the Biggoron Sword, use Bombchus to defeat the first Iron Knuckle and then fight the second with your regular sword. Always wait until after an axe swing to attack.
Once both enemies are defeated, open the chest to obtain the Boss Key.
How to Defeat Ganondorf
Before entering the fight, equip your Light Arrows and Mirror Shield. Light Arrows are essential for damaging Ganondorf, while the Mirror Shield helps protect you from his projectiles.
Phase 1: Reflect His Energy Orbs
Ganondorf divides the arena into an inner platform and an outer ring. He stays above the center, so try to remain on the outer ring.
Navi can’t lock onto him, so watch his movements carefully.
Ganondorf launches glowing purple orbs at you. Hit each orb back with your sword to begin a volley exchange. The speed increases with each hit, so keep your timing steady.
When Ganondorf is struck by the orb, quickly shoot him in the chest with a Light Arrow. He’ll fall to the center platform, giving you a chance to rush in and attack.
If you have the Biggoron Sword, switch to it before firing the Light Arrow to maximize your damage.
Phase 2: Survive the Falling Platforms
After each damage phase, move to a corner of the outer ring. Ganondorf will destroy more sections of the arena, and the corners are the safest places to stand.
After a few rounds, he’ll begin launching multiple orbs at once. Wait until they’re about to hit you, then perform a spin attack to send them all back.
As the arena shrinks, stick to the remaining corner platforms and avoid the dark waves he sends across the floor.
When only the corners remain, use the Hover Boots after knocking Ganondorf down to cross the gaps safely.
Deal enough damage to trigger the cutscene and begin the escape.
Escape Ganondorf’s Castle
Unlike the original Nintendo 64 version, the remake doesn’t have a timer during the escape sequence. You can take your time, but you’ll still need to defeat a few enemies along the way.
- Follow Zelda down the tower.
- Defeat the pair of Stalfos you encounter.
- Use the Longshot to cross the large gap.
- When Zelda stops to hold off enemies, turn around and use the Megaton Hammer to break the walls behind you.
- Cross the bridge filled with ReDeads. Zelda will immobilize them, so use a spin attack to defeat several at once.
Reach the large door to trigger the cutscene where Link and Zelda escape as the castle collapses.
How to Defeat Ganon
Ganondorf’s defeat isn’t the end. He transforms into Ganon, a massive beast who knocks the Master Sword out of your hands.
If you have the Biggoron Sword, use it. Otherwise, the Megaton Hammer will work.
Phase 1: Attack Ganon’s Tail
Your goal is to get behind Ganon and attack the glowing crystal on his tail.
You can try slipping between his legs or waiting for him to attack before moving behind him. I find using Light Arrows to stun him is the easiest approach.
Watch out for his long-range sword thrust and double horizontal slash. A Light Arrow can interrupt these attacks and give you an opening.
Phase 2: Target His Arms
After taking enough damage, you’ll get the Master Sword back, and Ganon will become more aggressive.
He’ll use area attacks, including lightning, a ground slam, and a sword strike across the floor.
Wait for the ground-level sword strike. Ganon leaves his arm low afterward, giving you a chance to attack the glowing weak point on his forearm.
You’ll only have a short window to land a few hits, so retreat as soon as he recovers. Repeat this strategy until both arm weak points are destroyed.
Phase 3: Finish Ganon
Once both arms are damaged, Ganon becomes immune to your attacks. Run away and focus on staying alive until Zelda creates an opening.
When she exposes the weak point on Ganon’s forehead, use Light Arrows to hit it after his slam attack. He’ll remain stunned briefly, giving you time to shoot.
After roughly four successful Light Arrows, Ganon will drop his swords and fall to his knees. Run up to him and attack with your sword. When prompted, press Y to finish him and complete your adventure.
Congratulations! You’ve defeated Ganon and completed The Legend of Zelda: Ocarina of Time.