
In Queen’s Domain, there’s a small island that’s surprisingly accessible with the right techniques. All you need to do is utilize all five air dashes along with a sword that has a lunging attack. In this guide, I’ll walk you through climbing onto the Mausoleum roof, jumping to the hidden island, and uncovering what treasures await you there.
Figuring out how to reach the island took some trial and error but trust me, it’s worth it for the loot. Players often trip up trying to reach that elusive spot without a proper strategy or equipment. In my experience, it’s all about finding the right angle and timing your jumps perfectly.
Before diving into the details, make sure you’ve unlocked all the air dashes and have a suitable sword ready. You’ll be climbing the Mausoleum, so gather what you need and let’s get started!
Hidden Island Guide
Getting to the hidden island in Queen’s Domain isn’t as straightforward as it seems, requiring some specific movement abilities and gear. The journey begins at the Mausoleum, where you’ll need to climb up to its roof before leaping towards the island.
Where Is the Hidden Island?
I spotted the hidden island while exploring Queen’s Domain, and it’s set apart from areas I could previously reach. The image below provides a visual reference for the specific island I’m aiming for.
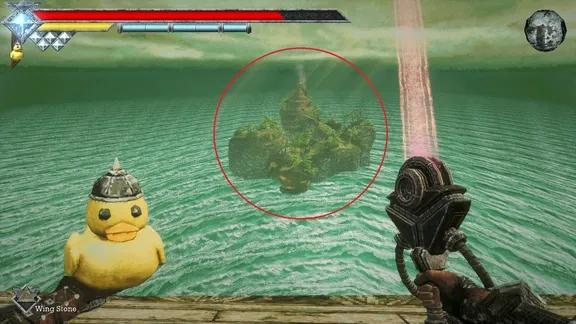
To access it, I utilize a series of air dashes and sword lunges while airborne. However, before making my attempt, I need to ensure I’m well prepared.
Requirements for Reaching the Hidden Island
Here’s what I need to have ready before attempting the journey:
- All five air dashes: It’s essential to unlock all five air dashes prior to attempting the jump.
- A sword with a lunging alternate attack: Options include the Rusty Sword, Ancient Sword, or Pandora Sword. After evolving the Rusty Sword, the Ancient Sword can be traded for. There might be other swords that work, but I can vouch for these.
- Access to the Mausoleum roof: Climbing onto the roof is crucial since it serves as the launch point for the jump to the island.
With these essentials in hand, I’m ready to make my way up to the Mausoleum.
How to Get onto the Mausoleum Roof
The initial step involves locating a window, then jumping onto a ledge to build momentum for the next air dashes. Follow these steps:
Step 1: Find the Window Near the Mausoleum Entrance
First, head toward the window shown in the image below. This area is accessible from the entrance I use after completing the Grand Archives, positioned just a short distance away.
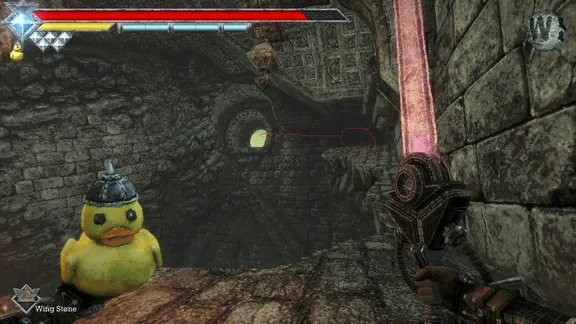
I follow the path until I reach the sarcophagus at the end. Then, I jump on top of it, using an air dash to reach the ledge nearby.
Step 2: Air Dash Left Toward the Skeletons
Upon reaching the ledge, I jump outward, turn left, and activate two air dashes. If I miscalculate my angle, I can use additional dashes to adjust.
I aim for the opening where some basic skeletons await. This is the next landing point I need.
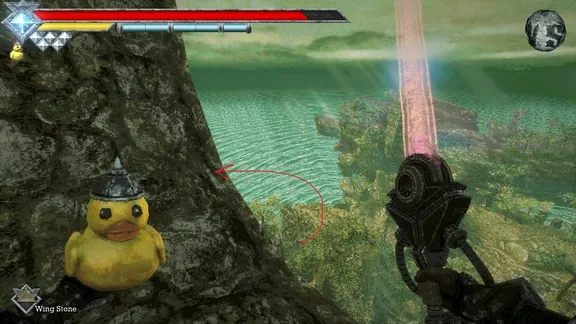
Step 3: Follow the Path to the Roof
When I land with the skeletons, I find the path to the roof much clearer to navigate. I continue along the route shown in the image until I reach the Mausoleum roof.
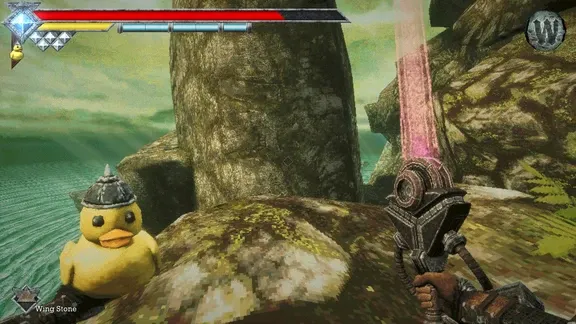
How to Jump from the Mausoleum Roof to the Island
Now perched on the Mausoleum roof, I prepare for the crucial jump. I need to position myself at the eastern edge and utilize my movement skills skillfully to clear the distance to the island.
Step 1: Go to the Eastern Edge of the Roof
I make my way to the eastern edge of the roof, as indicated in the image.
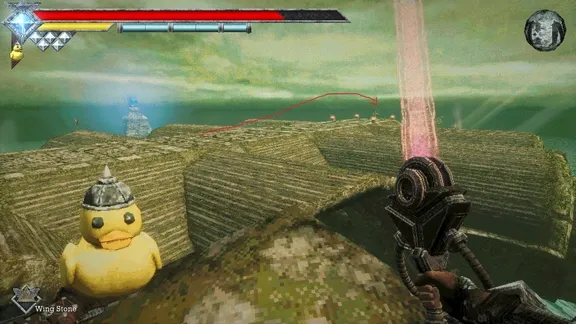
If it’s my first time here, I might encounter a miniboss surrounded by four braziers, dropping what I think is the Green Sealstone.
If I’m brand new to this area and lack enough air dashes, I’d advise coming back later. Trying to reach the island without adequate movement options can make it significantly harder.
Step 2: Drop onto the Platform Behind the Cross
From the eastern edge, I drop onto the roof platform behind the cross. Now it’s time to gear up for the jump to the island.
I take position as shown below, ensuring I make a solid running jump before leaping off the platform.
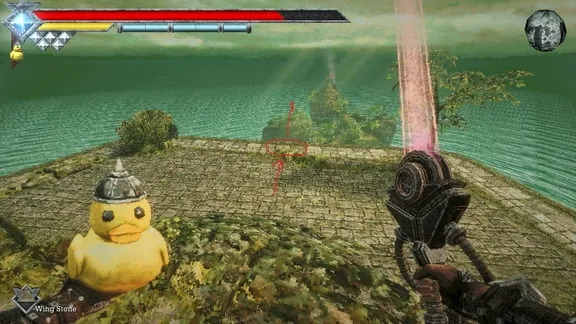
Step 3: Combine Air Dashes with Sword Lunges
After launching off the platform, I start using my air dashes to sail toward the island. The tricky part is even with five air dashes, I can still come up just short of making landfall unless I execute them well.
There are two ways to tackle the jump: I can space my air dashes carefully for maximum airtime or follow my go-to method: dash forward repeatedly then unleash my sword’s lunging attack while airborne.
I can utilize the Rusty Sword, Ancient Sword, or Pandora Sword’s lunging abilities to propel myself further. It’s crucial to balance my height to avoid descending too rapidly during the jump.
If needed, I can quickly switch to a Cestus mid-air and perform an uppercut to get a bit more lift.
By mixing the air dashes and sword lunges effectively, I can finally make it to the island’s shore.
Hidden Island Loot and Rewards
Upon landing on the hidden island, I can explore and collect various intriguing items.
- Trader’s House Keys: Dropped by a miniboss found on the island.
- Filthy Lootbag: Another collectible available during my exploration of the island.
- Silver Skull: One of the skulls can be located behind the shed—if my memory serves me right.
- Yellow Chest: A yellow chest awaits on one of the cliffs, and I get the keys from Umbada after unlocking his front door.
That’s my strategy for reaching the hidden island in Queen’s Domain. The key takeaway is to have all five air dashes and a sword with a lunging attack at your disposal. Once you’re on the Mausoleum roof and at the right spot, using those abilities together will let you cross that gap and discover what treasures the island has in store.