
Shrek 2 Remastered has 108 Magic Beans hidden across its chapters. You need to collect all of them to unlock the Fee-Fi-Fo-Fum achievement. Most chapters have 12 Magic Beans, and some also hide Gnomes you can free along the way.
I’ve covered all Shrek 2 Magic Bean and Gnome locations across the chapters, along with other achievements and optional quests. The locations are organized in the order you encounter them, so you can collect everything smoothly as you progress.
Shrek 2 Remastered Chapter achievement: And again in a fairy tale
Shrek 2 Remastered Chapter achievement: And again in a fairy tale
Magic Beans 1 & 2 and Gnome 1 At the start of the chapter, check the area to the left of Shrek’s house. You’ll find the first two Magic Beans there.
At the beginning of the chapter, check the area to the left of Shrek’s house. You will find the first two Magic Beans there.
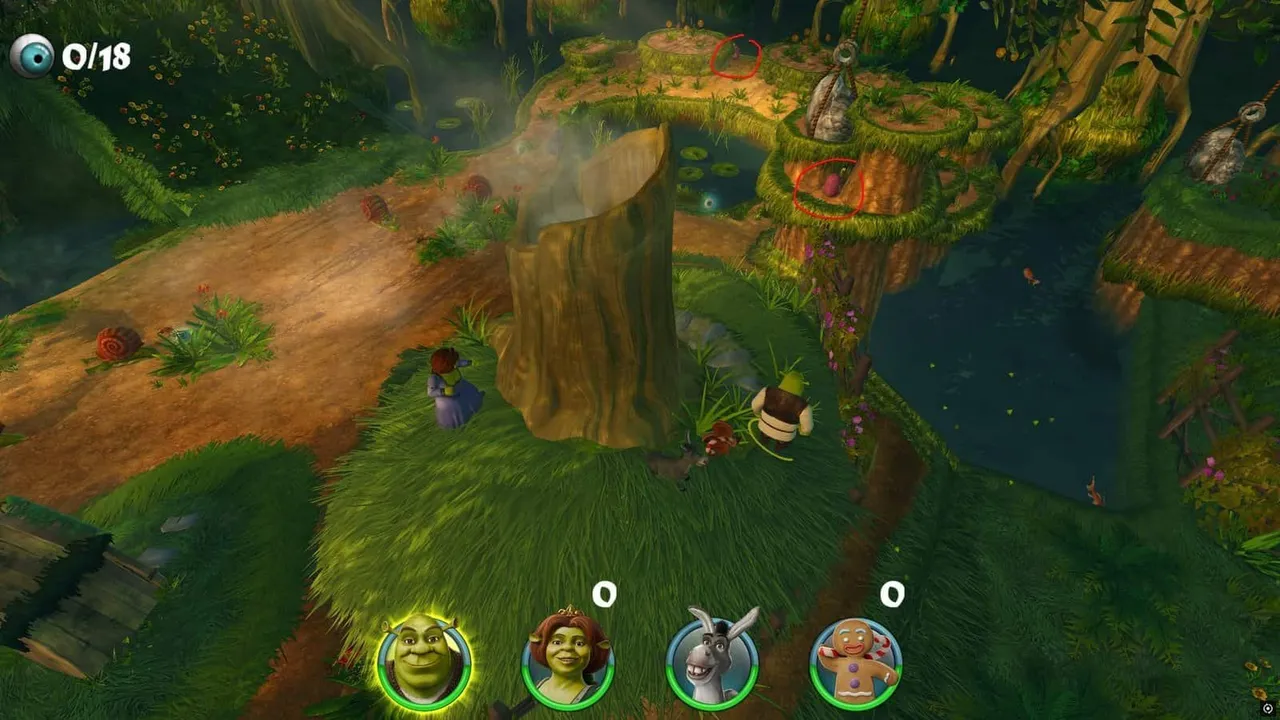
Look at the platform above this area as well. A rock is blocking a Gnome, so break it to free him.
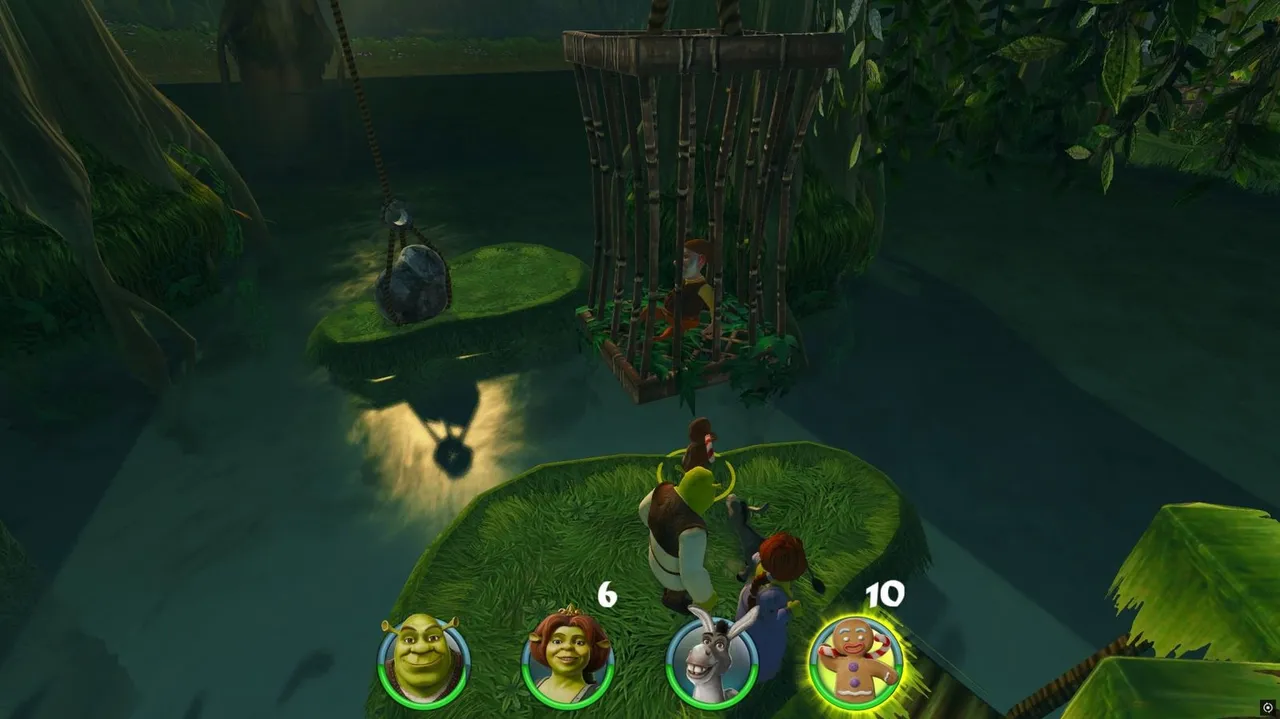
Magic Beans 3 & 4 and Gnome 2 Proceed to the next area after collecting the eyes. A Gnome is trapped in a cage nearby, along with two Magic Beans. Magic Bean 3 : Under the wooden platform. Magic Bean 4 : Above, next to the cage. To reach the higher bean, switch to Shrek and place the box on the marked spot, then switch to Fiona to jump up using the box.
After collecting the eyes, move forward to the next area. You will find a Gnome trapped inside a cage, with two Magic Beans nearby.
Magic Bean 5 and Gnome 3
After taking care of Robin Hood and his gang, head left. You’ll find a cage holding a Gnome and a Magic Bean.
To reach the higher bean, switch to Shrek and place the box on the marked spot. Then switch to Fiona and use the box to jump up.
Magic Bean 5 and Gnome 3
Magic Bean 6
Once at the fairy area, head down to the lowest part of the location to find the sixth Magic Bean.
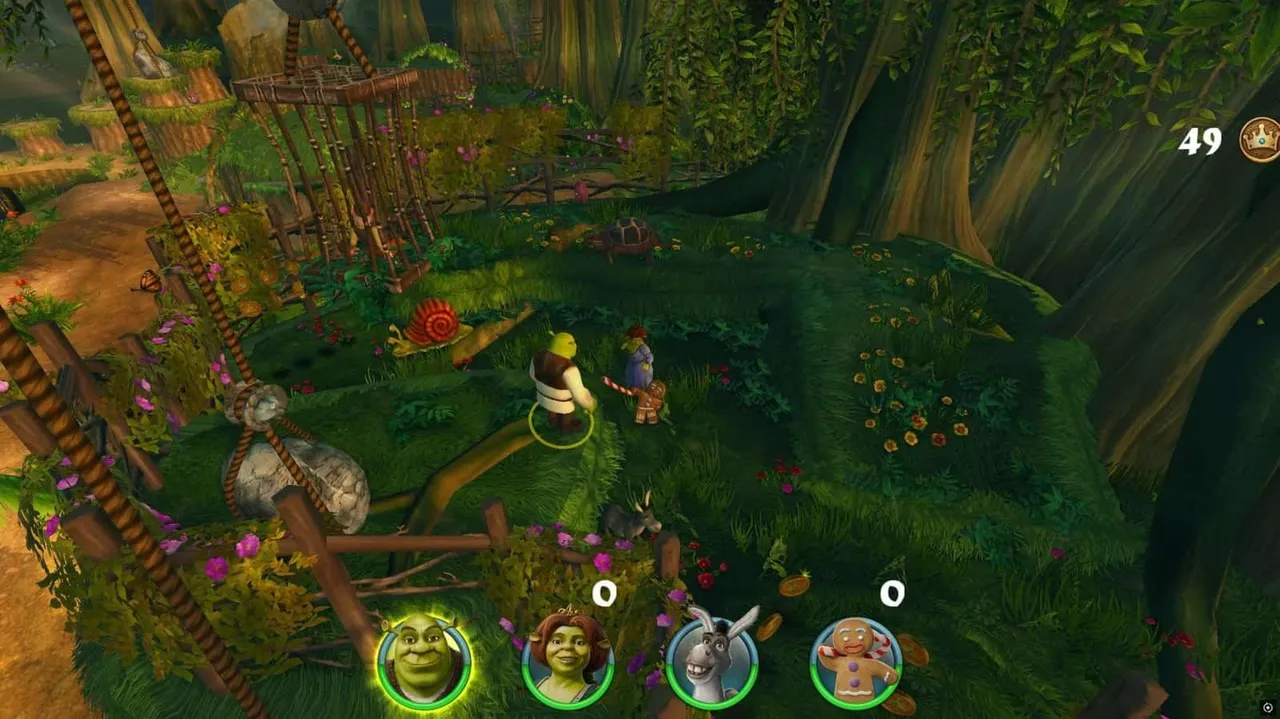
Gnome 4
Search for this Gnome just before reaching the area with the fairies.
Magic Bean 6
Magic Bean 7
After leaving the fairy area, check to the left of the closed gate with the target for the seventh Magic Bean.
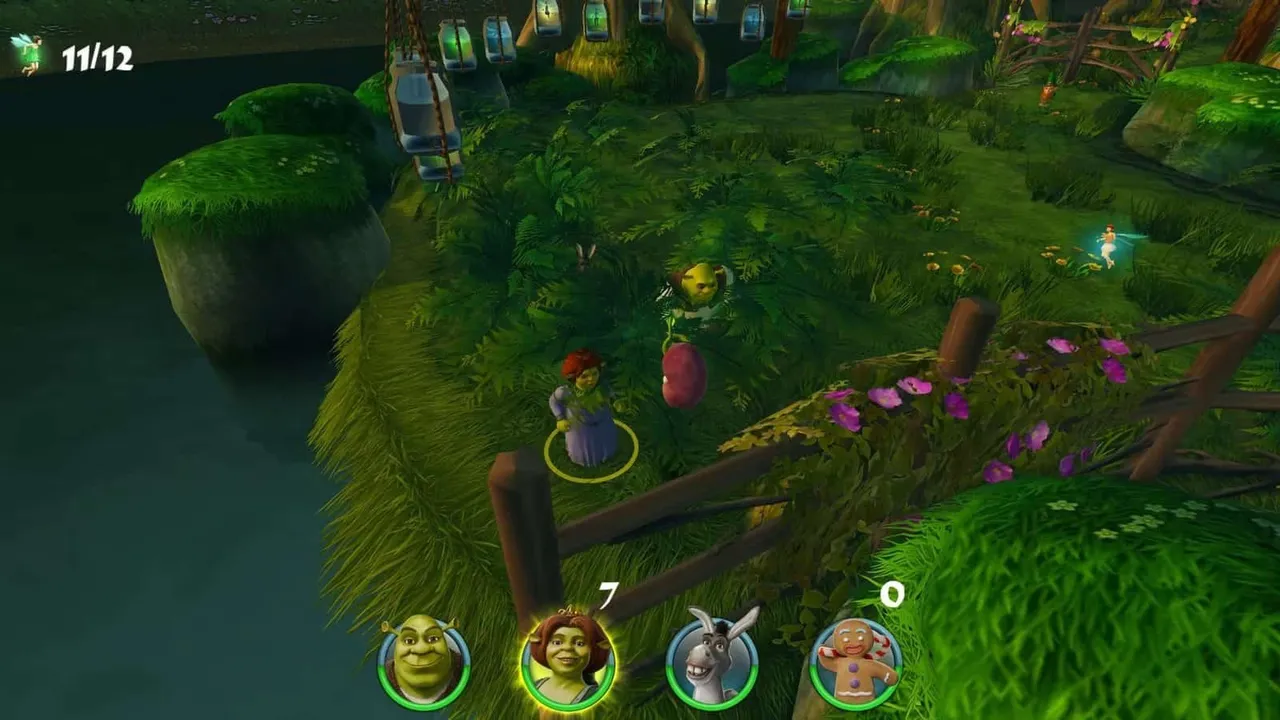
Magic Bean 7
After leaving the fairy area, look to the left of the closed gate with the target. You will find the seventh Magic Bean there.
Magic Bean 8 and Gnome 5 Continue until you reach the open area with snails and turtles. The Magic Bean is immediately to your right. Venture a bit left to find the fifth Gnome.
After learning how to use cookie bait, continue until you reach the open area with snails and turtles.
Magic Beans 9 & 10
Jump over the fence past the previous area. Once you land on the other side, check both sides of the fence for two Magic Beans.
Magic Beans 9 & 10
Gnome 6
After catching the chickens, you’ll see a passage on the left. Use Gingerbread to hit the target, opening the gate. The sixth Gnome is on the higher ground to the left.
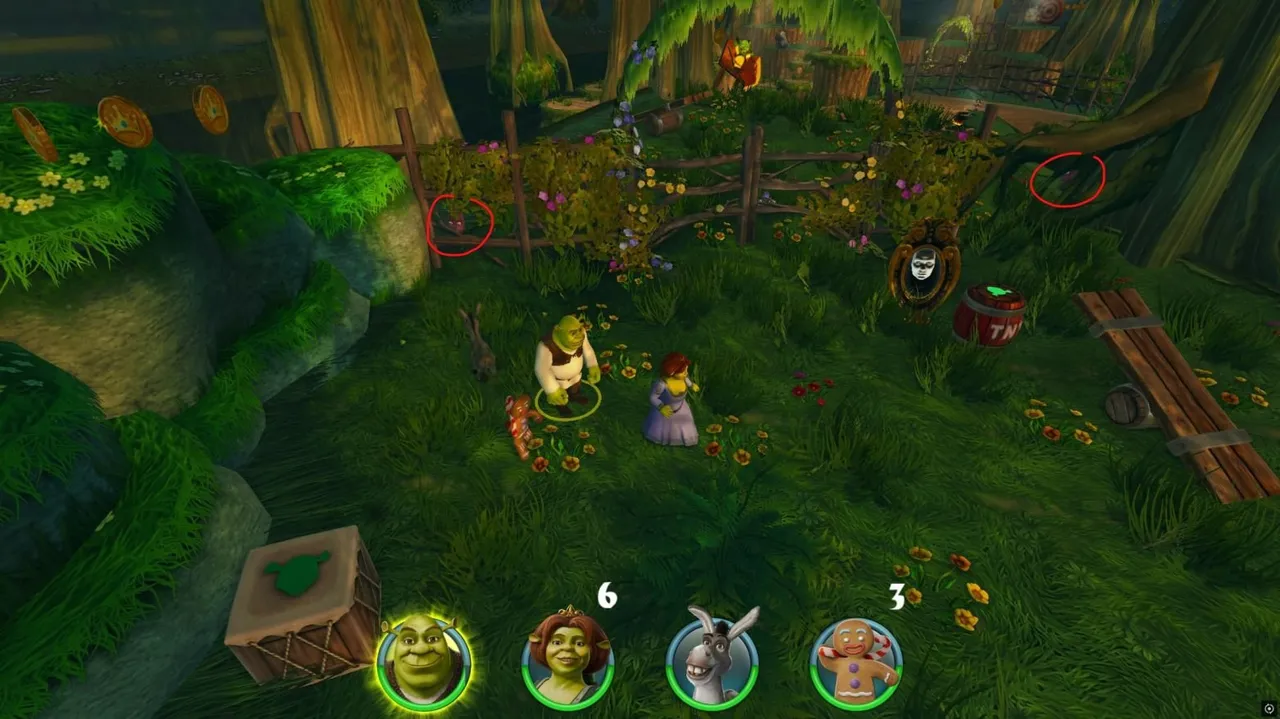
Gnome 6
After catching the chickens, move into the next area and look for a passage on the left.
Use Gingerbread to hit the target and open the gate. The sixth Gnome is on the higher ground to the left.
Magic Bean 11
Magic Bean 11
After passing through the crocodile section, check the boxes on the left side for the eleventh Magic Bean.
Magic Bean 12 and Gnome 7
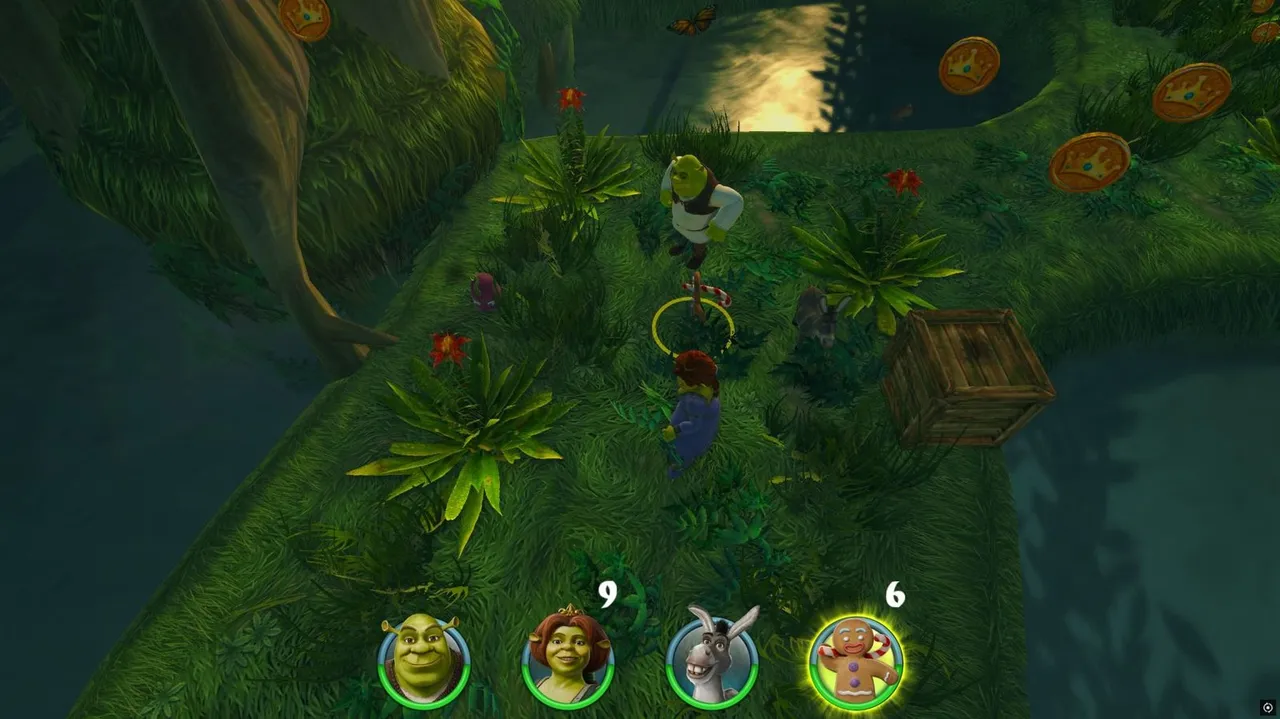
Continue until you reach a fork in the path near a cliff. Switch to Ginger and hit the target to lower the bridge.
Magic Bean 12 and Gnome 7
Continue until you reach a fork near a cliff. Switch to Ginger, hit the target to lower the bridge, and cross it to collect the Magic Bean. The final Gnome is nearby, trapped behind a rock.
Use Ginger to break the rock to free him; jump and throw the cane as shown in the screenshot.
To free him, use Ginger to break the rock. Jump and throw the cane from the position shown in the screenshot.
Blackbird Pie Achievement Reported glitch At the end of this chapter, complete a rhythm sequence to unlock the Blackbird Pie achievement. Hit every note correctly to make all the birds explode.
You cannot miss any notes; if you do, Fiona will start coughing, indicating a failed sequence.
Tips for completing the rhythm sequence:
- Pay close attention to the button prompts and press every note correctly.
- If Fiona coughs, stop pressing buttons; you’ll need to restart the sequence.
- If you fail, the cutscene will restart, letting you try again.
The button prompts use Xbox labels, but if you’re on keyboard and mouse, they’ll show as WASD.
Note: Some players report a glitch where the final bird doesn’t explode or count, which may prevent the achievement from unlocking.
At the end of this chapter, you must complete a rhythm sequence to unlock the Blackbird Pie achievement. Hit every note correctly to make all the birds explode.
You cannot miss any notes. If you miss one, Fiona will start coughing, which means the sequence has failed.
Tips for completing the rhythm sequence:
- Pay close attention to the button prompts and press every note at the correct time.
- If Fiona starts coughing, stop pressing buttons. The sequence will end, and you will need to try again.
- If you fail, the cutscene restarts, allowing you to attempt the sequence again.
The button prompts use Xbox button labels even when you play with a different controller. On a keyboard and mouse, the prompts use WASD.
Important: Some players are reporting an achievement bug where the final bird does not explode or count, even after successfully hitting every note. This issue may prevent the achievement from unlocking.
Chapter 2 – The Creepy Forest Chapter achievement: Mouse Race
Chapter achievement: Mouse Race
Magic Beans 1 & 2 Right at the start of the chapter, turn around and head back. The first Magic Bean is inside a fallen tree, with the second nearby in the same area.
At the very beginning of the chapter, turn around and head back. You will find the first Magic Bean inside a fallen tree.
Check the nearby fallen tree area to collect the second Magic Bean as well.
Magic Bean 3 After learning to deactivate mousetraps, head to the stone platforms. Look between them for the third Magic Bean.
After learning how to deactivate mousetraps, continue towards the stone platforms. Look between the platforms to find the third Magic Bean.
Magic Bean 4 Continue across the stone platforms until you reach the first bridge with bats. The fourth Magic Bean is around there.
Continue across the stone platforms until you reach the first bridge with bats. The fourth Magic Bean is nearby.
Magic Bean 5 After completing the arena with the dragon statue, you’ll come upon a small fenced area with a lever and some rats. The fifth Magic Bean is inside this area, which opens as part of the story.
After completing the arena with the dragon statue, you will reach a small fenced area containing a lever and several rats.
Leprechaun Salesman
After the section where you cut down trees, look for the Leprechaun Salesman before proceeding.
Leprechaun Salesman
Magic Bean 6
In the arena with the Poisoned Apple Tavern, check behind the rock where the carriage is parked. You’ll find the Magic Bean there, but be wary of the invisible walls. Red Riding Hood makes it easier to reach this bean.
Magic Bean 6
Magic Bean 7
After the Poisoned Apple Tavern, look toward the platforms near the bat bridge where you’ll find a crate. Break it, and then hit it again to reveal the seventh Magic Bean.
Magic Bean 8
Find the entrance to the cemetery. The Leprechaun will ask for 100 coins to enter. Before going inside, check the left side of the entrance to find the eighth Magic Bean.
Magic Bean 7
After passing the Poisoned Apple Tavern, look towards the platforms near the bat bridge.
You will find a crate there. Break it to collect some coins, then hit it again to reveal the seventh Magic Bean.
Magic Bean 8
Find the entrance to the cemetery, where the Leprechaun asks for 100 coins before letting you enter.
Before going inside, check the left side of the entrance to collect the eighth Magic Bean.
Magic Bean 9
Magic Bean 9
Once inside the cemetery, move past the first two sarcophagi and check the left side for the ninth Magic Bean.
Magic Bean 10
Magic Bean 10
Continue through the cemetery to an area with pairs of mousetraps. Look near one to find the tenth Magic Bean.
Look around one of these pairs to find the tenth Magic Bean.
Magic Bean 11 A little further ahead, check the sarcophagi on the left side, which can be broken. The first one contains the eleventh Magic Bean.
A little further ahead, check the sarcophagi on the left side. You can break them, and the first one contains the eleventh Magic Bean.
Magic Bean 12 After leaving the cemetery, you’ll reach an arena with enemies and a river on the left. Look right for a rock with a chest and a jumping platform; the final Magic Bean is inside the chest.
After leaving the cemetery, you will reach an arena with enemies and a river on the left.
Look to the right for a rock with a chest and a nearby jumping platform. The final Magic Bean is inside the chest.
Chapter 3 – The Far Far Away Kingdom
Chapter 3 – The Far Far Away Kingdom
Chapter achievement: And on the road again…
Magic Bean 1
Magic Bean 1
At the beginning of the chapter, check the right side of the starting area. Jump onto the platform to collect the first Magic Bean.
Magic Beans 2 & 3
Magic Beans 2 & 3
Near the start, King Harold stands on the right with a closed area on the left. Use both characters to open the entrance: one on the outer button and the other on the inner button. Inside, you’ll find two Magic Beans.
To open the entrance, use both characters. Place one character on the outer button and the other on the inner button. Once the area opens, collect the two Magic Beans inside.
Magic Beans 4, 5, 6 & 7
Magic Beans 4, 5, 6 & 7
Along the main street, you can find four Magic Beans. Two are on top of the taxi carriages; climb up to get them.
For another, wait for a carriage to pass and jump onto it. Little Red Riding Hood can jump directly onto the moving carriage.
Check the rest of the main street for the fourth bean.
Two of them are on top of the taxi carriages. Climb onto the carriages to collect them.
For another bean, wait for a carriage to pass and jump onto it. Little Red Riding Hood can jump directly onto the moving carriage.
Check the remaining part of the main street for the fourth bean.
Magic Bean 8 Continue to the end of the main street to find the eighth Magic Bean.
Continue to the end of the main street. You will find the eighth Magic Bean there.
Magic Bean 9 Take the right-hand branch off the main street. Follow this path to find the ninth Magic Bean.
Take the right-hand branch off the main street. Follow this path to find the ninth Magic Bean.
Magic Beans 10 & 11
Magic Beans 10 & 11
During the Hooligan Packing event, you can gather two more Magic Beans:
- Magic Bean 10: Check the left side; you can collect this bean directly from the map.
- Magic Bean 11: Look above the Hooligan Carriage on the right. Move right, jump from the platform onto the carriage visors, and then jump left across them to reach the bean.
- Magic Bean 10: Check the left side of the area. You can collect this bean directly from the map.
- Magic Bean 11: Look above the Hooligan Carriage on the right. Move as far right as possible, jump from the platform onto the carriage visors, and then jump left across them to reach the bean.
Magic Bean 12
Magic Bean 12
During the mission to find parts of Humpty Dumpty, look around the area to snag the final Magic Bean of this chapter.
Chapter 4 – Ogre Assassin
Chapter 4 – Ogre Assassin
This chapter has two achievements.
I’m Puss… in Boots
I’m Puss… in Boots
Chapter completion
Complete the Ogre Assassin chapter to unlock this achievement.
Complete the Ogre Assassin chapter to unlock this achievement.
More Dangerous Than the Sword No damage required Complete the entire chapter without taking any damage. Avoid enemy attacks in combat sections as even one hit will prevent you from achieving this requirement.
No damage required
Complete the entire chapter without taking any damage.
Avoid enemy attacks and stay careful during combat sections. Taking even one hit can prevent you from meeting the achievement requirement.
Chapter 5 – On the Road
Chapter 5 – On the Road
Chapter achievement: Pumpkins in Porridge
Additional Quest – Collect Snail Eyes
Additional Quest – Collect Snail Eyes
In this chapter, you need to collect snail eyes by defeating the snails. There are exactly 25 snail eyes to collect, so kill all the snails throughout the level.
There are exactly 25 snail eyes to collect. Kill all the snails throughout the level so you don’t leave any behind.
Magic Bean 1
Magic Beans 8, 9 & 10
You’ll find these three Magic Beans at the sawmill. Move through the area until you activate the crane with Donkey. Collect all three in the surrounding platforms and paths.
Magic Bean 2
Magic Bean 2
After defeating the pumpkin, at the fork in the road, take the left path instead of the sign towards the farm. Go to the end, where you’ll see a rope between two stumps. Use Shrek to throw the Cat onto the first stump, then control the Cat to walk across the rope to collect the Magic Bean.
Take the left path instead of following the sign towards the farm. Continue to the end, where you will find a rope between two stumps.
Use Shrek to throw the Cat onto the first stump. Then control the Cat and walk across the rope to reach the other stump and collect the Magic Bean.
Magic Bean 3
Magic Bean 3
In the area with squirrels, cross another rope before reaching the spiked millstones. Look around to find the third Magic Bean.
Look around this section to find the third Magic Bean.
Magic Bean 4 After encountering the people standing on a stump, check the area to collect the fourth Magic Bean.
After meeting the people standing on a stump, check the area to collect the fourth Magic Bean.
Additional Quest – William Grumpy
After meeting the first group of people, head left until you reach another group.
Additional Quest – William Grumpy
After meeting the first group of people, head left to a second group. You’ll find a goat named William Grumpy, who needs help crossing a bridge. Complete this task for an optional photo quest.
Complete this task as part of the optional photo quest.
Magic Bean 5
After the second fight against the pumpkin mini-boss, look around the area to find the fifth Magic Bean.
Magic Bean 6
Magic Bean 6
The sixth Magic Bean is found inside William Grumpy’s garden.
Magic Bean 7
Magic Bean 7
After shutting off the saws, check the right side of the stump for the seventh Magic Bean.
Magic Bean 5 After the second fight against the pumpkin mini-boss, look around to find the fifth Magic Bean.
You will find these three Magic Beans at the sawmill.
Continue through the area until you activate the crane using Donkey. Check the surrounding platforms and paths to collect all three beans.
Magic Bean 11 After activating the second tap, look around to find the eleventh Magic Bean.
After activating the second tap, look around the area to find the eleventh Magic Bean.
Additional Quest – Escort the Second Goat
You will encounter another goat who needs help crossing a bridge.
Additional Quest – Escort the Second Goat
You’ll come across another goat needing help crossing a bridge. Escort him safely across like you did with William Grumpy. This section is longer, so be careful during the crossing—if the goat falls, you’ll have to assist it again.
If the goat falls into the abyss and takes significant damage, you will need to go back and help it again.
Magic Bean 12
After the second goat asks you to escort him across the bridge, look to the left of the bridge.
Magic Bean 12
After escorting the second goat, look left of the bridge for a ledge; jump from a column forming part of the bridge to collect the last Magic Bean of this chapter.
Work in Progress
This guide is still being updated. More Magic Bean and Gnome locations, along with additional achievement details, will be added as I progress through the remaining chapters of Shrek 2 Remastered. Check back later for the complete collection guide.