
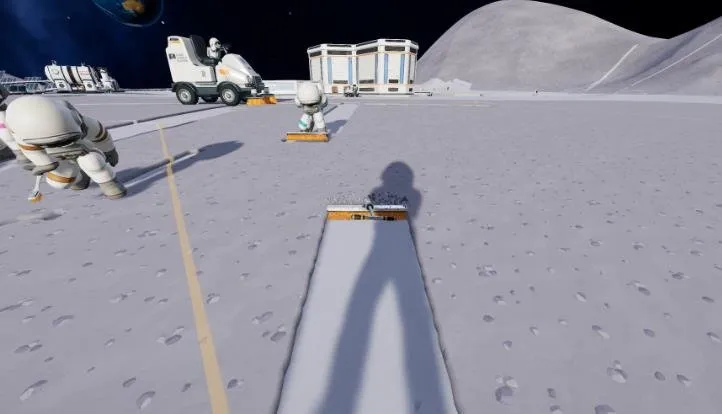
Building an efficient setup in Moon Sweepers takes careful planning to avoid messy bottlenecks. This factory layout guide covers everything from early half-size builds to fully optimized end-game stations.
Conveyor routing gets messy fast if you do not plan your splitter placement carefully. Nail this setup early to keep your resource loops running smoothly without constant jams.
Make sure you have plenty of storage and basic components unlocked before mapping out your splitter rows.
Moon Sweepers Guide – End Game Ratio for Catchers
Moon Sweepers Guide – End Game Ratio for Catchers
Moon Sweepers Factory Layout Guide
Start with a compact core and link your machines in the proper sequence before expanding. Optimize conveyor placement, add reliable solar panels, and scale up for end-game J.O.O.N.A.S. assembly lines.
Conveyor throughput is your biggest restriction in this game. You can only attach 12 conveyor belts to a single base, so keeping every line utilized is essential.
Conveyor belts represent the main bottleneck in this game. You can connect only 12 conveyor belts to a single base, so the main goal is to optimize them to their maximum capacity.
Full-size factory
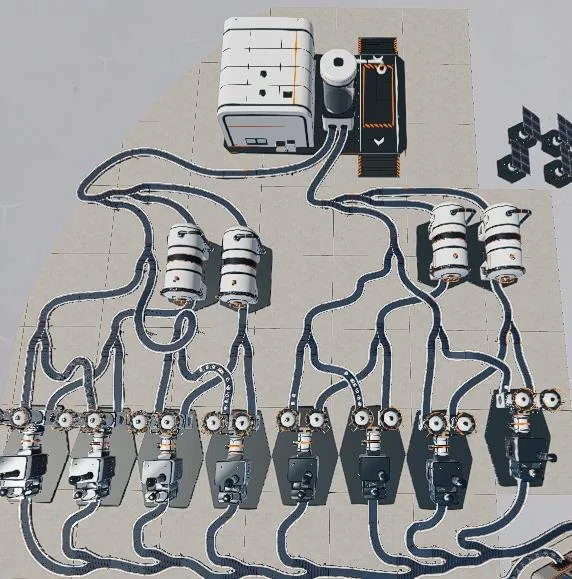
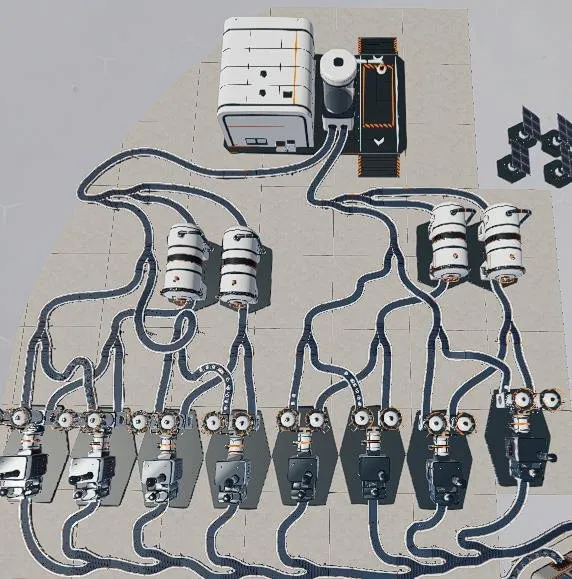
The build is very simple and compact:
2 Capsule Catchers -> 4 Pressure Chambers -> 8 Stone Presses
The splitter layout is important!
Half-size factory guide
1. Place the machines and splitters
Place all splitters, Stone Presses, Pressure Chambers, Combiners, and Capsule Catchers in the proper arrangement.
Begin with the Combiners, add the Stone Presses, lay down the first row of splitters, position the Pressure Chambers, set up the second and third rows of splitters, and finish with the Capsule Catcher.
Then start with Combiners, then place Stone Presses, the first row of splitters, Pressure Chambers, the second row of splitters, the third row of splitters, and finally the Capsule Catcher.
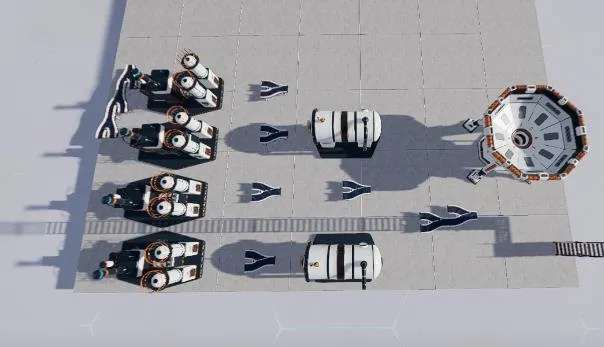
2. Connect the sand conveyors
After placing the hardware, run conveyor belts to route sand between the different units.
3. Connect the dust conveyors
Run additional belts to handle dust transportation across the production line. Lift selected lines using CTRL + mouse wheel to keep the overall conveyor grid compact.
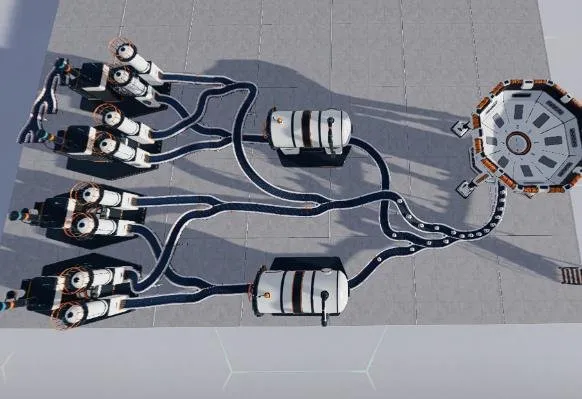
4. Connect the export conveyors and place solar panels
Hook up export conveyors and deploy solar panels to supply steady power to the factory floor.
Aim for at least two large solar panels per Pressure Chamber and Stone Press to avoid brownouts. I usually just spam solar panels without counting them.
Moon Sweepers export conveyors and large solar panels powering the active factory.
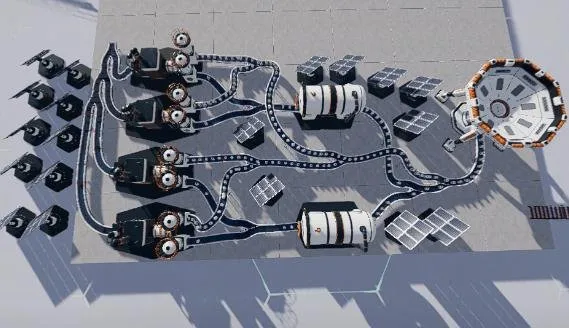
When scaling to a full-size factory, simply copy and paste this entire build and merge the Stone Block conveyor.
Connecting the factory to a garage
One garage outputs two conveyor belts.
When linking the factory directly to a garage, swap one Capsule Catcher with a garage output. One garage supplies enough dust to run a full-size factory.
Half-size factory connection
Full-size factory connection
End game and additional information
8 Stone Presses will fully load a conveyor belt.
Scale your factory down during the early game and expand it later once your resource stockpiles grow.
The main benefit of this build is that it fully loads the Capsule Catchers and station conveyors.
Sometimes conveyor belts can glitch out, so leave some physical distance between them!
The maximum-efficiency end-game build will look like this.
J.O.O.N.A.S. factory strategy
Build your initial factory, connect it to the garage, and maintain a steady resupply stream.
Next, construct a separate factory dedicated to J.O.O.N.A.S., or at least set up a half-size variation.
Once the first J.O.O.N.A.S. facility reaches full load, start construction on the second one.
As soon as the second J.O.O.N.A.S. factory hits maximum capacity, disconnect the garage and hook up two Capsule Catchers.
From this point onward, keep constructing additional factories and J.O.O.N.A.S. units as much as possible.