
When designing the best factory build in Moon Sweepers, the biggest hurdle to clear is the conveyor belt limit. Because every base only supports up to 12 connected conveyors, you have to make every single line count toward your output. This guide walks through a compact production layout that squeezes maximum efficiency out of those restricted connections.
Building this setup early prevents resource bottlenecks later and keeps your factory expanding smoothly without messy cable spaghetti. Taking a few minutes to plan your input and output distribution now saves hours of painful teardowns once production ramps up.
You will learn how to balance your production nodes, scale from early game to late game, and utilize the garage connection properly. Grab your wrenches and let us dive straight into the numbers.
Conveyor Belt Optimization Guide
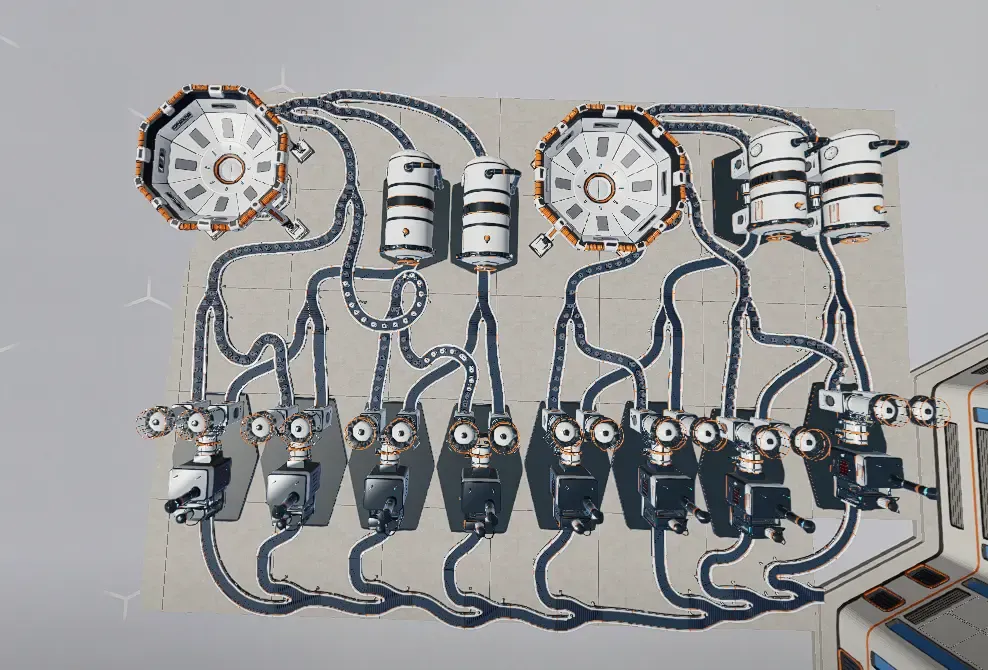
The preferred configuration relies on a balanced 2-4-8 production ratio using Capsule Catchers, Pressure Chambers, and Stone Presses. This arrangement keeps the physical footprint tight while fully saturating the input and output conveyor limits.
Understanding the Conveyor Belt Limit
The main bottleneck in Moon Sweepers is the hard cap on the number of conveyors you can hook up to a single base. With a strict limit of 12 connections, optimizing your layout matters far more than just mindlessly spamming extra lines.
The core objective is pushing maximum load through both input and output paths simultaneously. Doing this guarantees you get absolute peak efficiency from your limited base connections.
My Compact and Efficient Production Setup
This layout is straightforward and avoids overly complicated routing paths. Simply arrange your production line using these exact proportions:
- 2 Capsule Catchers handling initial collection
- 4 Pressure Chambers processing intermediate materials
- 8 Stone Presses finishing the heavy output work
Running eight Stone Presses with this configuration naturally turns the conveyor belt into your main bottleneck. This exact pinch point is the goal, ensuring zero idle capacity and total utilization of your available throughput.
Pro tip: Double-check your belt speeds before scaling up your presses to prevent sudden item backups.
Early-Game Setup and Garage Connection
During the early hours, you can deploy this exact same production layout at half its total scale. Starting small lets you get the assembly line running before you have the materials for the full build.
You can also hook this entire production line directly into your garage for easy resource transfer. The priority here is making sure your input and output conveyors run without downtime.
Late-Game Maximum Efficiency Build
Transitioning into the late game requires scaling up to the full production layout to saturate your conveyor capacity. Pushing maximum volume through your inputs and outputs unlocks the true potential of your base connections.
Integrating Solar Panels into the grid keeps everything powered without extra hassle. Your final maximum-efficiency layout incorporates these key machinery counts:
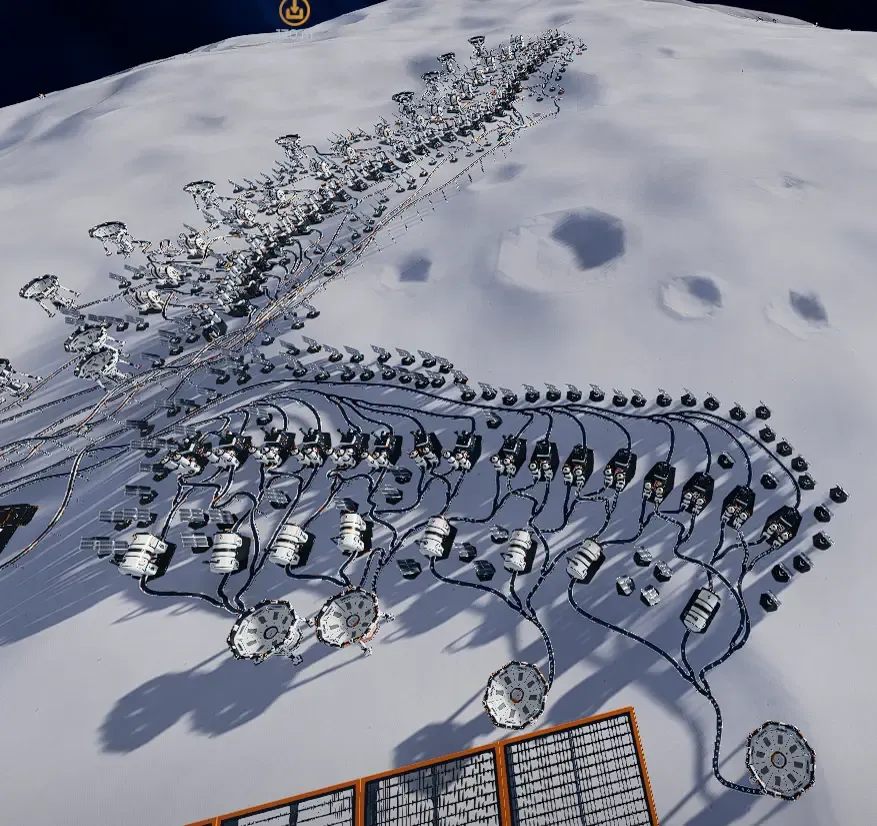
Mastering factory layout in Moon Sweepers comes down to respecting that 12-conveyor restriction. Sticking to the compact 2-4-8 ratio lets you scale smoothly from a modest early-game operation into a powerhouse late-game facility.