
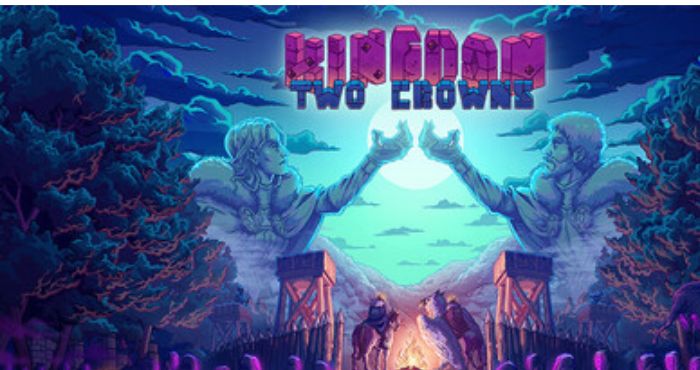
If you are just starting Kingdom Two Crowns, the game can feel a little confusing at first. You have to build your kingdom, recruit people, manage coins and gems, explore new islands, and somehow survive the nightly attacks from the Greed.
In this guide, I will walk you through the important things you need to know about Kingdom Two Crowns. We will cover the basic controls, coins and gems, seasons, animals, NPCs, subjects, enemies, buildings, walls, towers, farms, mounts, and some of the most useful upgrades you can get.
There is a lot to learn in this game, but you don’t need to understand everything immediately. Once you understand how your economy works and how to protect your kingdom at night, the rest of the game becomes much easier. So let’s go through the important systems one by one.
Kingdom Two Crowns Beginner Guide (October 2026)
Kingdom Two Crowns is built around a simple day-and-night cycle.
During the day, you explore the island, collect coins, recruit new subjects, build defenses, upgrade your kingdom, and prepare for the next attack.
At night, the Greed starts coming through the portals and attacks your kingdom.
The longer you survive, the more dangerous the enemies become, so preparing your defenses during the day is extremely important.
Basic Controls
For Player 1, you can use the following controls:
- Left Arrow / A: Walk left
- Right Arrow / D: Walk right
- Down Arrow / S: Drop a coin or gem, or hold to pay for something
- Left Shift: Run while walking
- Esc: Pause the game
For Player 2:
- H: Walk left
- K: Walk right
- J: Drop a coin or gem
- G: Run while walking
- ~: Enable or disable split-screen co-op
Protecting Your Crown
Your crown is one of the most important things in Kingdom Two Crowns.
Whenever your monarch is hit by an enemy, you lose coins depending on the strength of the attack. The important thing to remember is that you do not have an invulnerability period after being hit.
If you are hit when you have no coins, your crown can be knocked off.
If the crown falls into the water or the Greed successfully steals it, you lose that crown. A monarch without a crown can still pick up and drop coins, but they cannot purchase anything.
If another monarch still has their crown, they can pay 8 coins to craft a new crown for their partner.
If all active monarchs lose their crowns, the game is over.
So, whenever you are exploring outside your walls, I recommend keeping some coins with you. They can give you an extra layer of protection against losing your crown.
Coins
Coins are the main currency in Kingdom Two Crowns.
You will use coins for almost everything, including:
- Recruiting subjects
- Buying tools
- Building walls
- Building towers
- Upgrading your kingdom
- Hiring troops
- Constructing special buildings
- Traveling between islands
There are several ways to earn coins, including hunting animals, farming, fishing, and other kingdom activities.
Your monarch can only carry a limited number of coins. If your bag becomes full and additional coins overflow, they have a 50/50 chance of either dropping on the ground or falling into the water.
In multiplayer, coins are not shared between monarchs. If you want to give coins to your partner, drop them on the ground so they can pick them up.
Gems
Gems are the secondary currency.
Unlike coins, gems are mainly used to unlock special structures, mounts, hermits, and other permanent upgrades.
Gems can only be found in gem chests, so you need to be careful with them because there is a limited supply on each save file.
Gems take up more space in your bag than coins. They will only be knocked out after you run out of coins.
If a gem is knocked out of your bag, it will not randomly fall into the water like coins can.
Once you use gems to unlock something, that unlock is permanent for that save file. Even if you eventually get a game over, previously unlocked gem content can be purchased again using coins.
Biomes
Kingdom Two Crowns has different biomes that change the appearance and some gameplay elements of your kingdom.
Default Biome
The default biome is the standard Kingdom Two Crowns setting.
One of its gameplay differences is access to pikemen.
Shogun Biome
The Shogun biome is based around feudal Japan.
Here, several units and currencies receive different names and appearances. Squires become ronin, knights become samurai, and coins become mon.
The Shogun biome also has more bamboo forests and replaces pikemen with ninjas.
Dead Lands
Dead Lands is another major biome that adds additional content and mechanics to explore.
Seasons
Kingdom Two Crowns has four seasons, and each season lasts 16 days.
A complete cycle of all four seasons therefore takes 64 days.
The season continues between islands and only resets to Spring after a game over.
Spring
Spring is the starting season.
Grass begins growing again, which allows rabbits and deer to return. Farms also become productive again.
Summer
Summer is similar to Spring, except new grass no longer spawns. Existing grass can continue expanding.
Fall
Fall is generally similar to Summer in terms of gameplay.
Winter
Winter is the season you really need to prepare for.
Grass disappears, deer stop spawning, and normal farms freeze.
Because of this, your usual sources of income become much more limited.
During winter, you can still make money by:
- Having pikemen or ninjas fish
- Using farmers to forage berries
- Hunting the boar
The boar can only be killed once per winter.
Kingdom Decay
When you leave an island you have already visited, that island slowly experiences decay.
For every day your monarch is away, the island experiences one day of decay.
The main things affected are walls and archers.
Different structures have different resistance periods before decay begins affecting them.
| Structure | Resistance |
|---|---|
| Archer | 1 day |
| Tier 1 Wall | 2 days |
| Tier 2 Wall | 4 days |
| Tier 3 Wall | 8 days |
| Tier 4 Wall | 12 days |
| Tier 5 Wall | 20 days |
Building a lighthouse can increase the amount of time your island is protected from decay.
Animals
Animals are an important source of income and, in some cases, provide other useful benefits.
Rabbits
Rabbits spawn from patches of tall grass.
When an archer kills a rabbit, it drops 1 coin.
Rabbits don’t spawn during winter because the grass disappears.
Deer
Deer spawn in forests and provide 3 coins when killed.
They take two hits from an archer and will run away when approached.
You can use this behavior to herd deer back toward your kingdom so your archers can hunt them.
Deer are especially useful because they can be hunted by archers in towers and at night.
However, deer stop spawning during winter.
Fish
Fish can be found in the river in the foreground.
Pikemen and ninjas can automatically hunt them during the day and each fish provides 1 coin.
This makes fishing particularly useful during winter when other sources of income become unavailable.
Dogs
You can find a dog by breaking a fallen tree.
Once freed, the dog follows your monarch and can warn you about incoming enemies by barking in their direction.
Be careful, though, because the Greed can kidnap your dog.
If you use a teleporter, your dog does not teleport with you and must travel across the island to catch up.
The Boar
The boar is a special winter animal.
It appears near its den and attacks the monarch once provoked.
The boar can knock all the coins out of your bag. If you have no coins, it can knock off your crown instead.
If it hits a wall, it becomes stunned for a short time, giving your archers an opportunity to damage it.
The boar has a lot of health, but killing it rewards you with a massive 29-coin payout.
Only one boar can be killed per winter.
Important NPCs
Vagrants
Vagrants are the main way you populate your kingdom.
They spawn at vagrant camps and wander around nearby.
Pay a vagrant 1 coin and they become a peasant who can then pick up a tool and take a job.
Protecting your vagrant camps is important because cutting down a tree directly beside one can permanently destroy it.
The Banker
The Banker appears after upgrading your kingdom to Tier 4.
You can give him coins during the day and he stores them safely.
The bank can hold an unlimited amount of coins, while the Banker himself can carry up to 10.
Your stored money earns 7% interest per day, although the interest is capped at 8 coins per day.
Because of this, depositing spare money with the Banker can be extremely useful if you are planning for the long term.
The Merchant
The Merchant appears on the first two islands.
On your first day, he arrives with bags on his donkey. The following morning, he gives you 8 coins when you walk past him.
You can then pay him 1 coin to send him back to his hut, where he will restock.
Be careful when clearing forests because destroying the trees around his hut can permanently remove the Merchant.
The Ghost
A ghost appears when you begin an island.
The ghost represents a previous monarch and generally leads you toward your kingdom while providing some basic guidance.
Kingdom Subjects
Once you recruit vagrants, you can turn them into different types of workers and soldiers.
Peasants
Peasants don’t have a job or tool.
They wait around your kingdom until they find an available tool.
Give them a bow and they become archers. Give them a hammer and they become workers, and so on.
Archers
Archers use bows and are responsible for hunting and defending your kingdom.
During the day, they hunt animals around the forest.
At night, they return behind your walls and attack the Greed.
Archers can also be placed in towers, which gives them a major defensive advantage.
Workers
Workers use hammers.
They build and repair structures, clear trees, and operate heavy defensive weapons such as catapults.
Try not to send them too far from your kingdom late in the day because they can become vulnerable when the Greed arrives.
Farmers
Farmers use scythes and generate coins by growing crops.
During winter, they can also forage berries if you find suitable berry bushes.
Farmers are extremely important for keeping your economy running, especially when your kingdom becomes larger.
Pikemen
Pikemen are available in the default biome.
They use spears to defend your walls and can also fish during the day.
Their spear attacks can hit multiple enemies at once.
However, their spears eventually break, turning them back into peasants.
Ninjas
Ninjas replace pikemen in the Shogun biome.
During the day, they fish, while at night they hide in the bamboo forest and ambush the Greed.
They can throw shurikens and perform powerful katana attacks.
Squires
Squires use shields and lead groups of archers.
When you purchase a shield, a nearby peasant becomes a squire and can command a group of archers.
You can pay the banner outside your outer wall to order the squire and their squad to attack a nearby portal.
Knights
Knights are upgraded squires.
Once you have access to the Forge, you can purchase swords and promote squires into knights.
Knights have more coin capacity and better survivability than squires, making them the backbone of your late-game offensive force.
Enemies
The Greed
The Greed are the main enemies in Kingdom Two Crowns.
They spawn from portals at night and attack your kingdom.
They can steal coins and tools, attack subjects, and damage your walls.
Regular Greed can be killed with a single arrow.
Early in the game, you can sometimes use coins to distract or bribe them, giving you more time to prepare your defenses.
Armored Greed
Armored Greed wear masks that protect them from arrows.
After taking enough hits, their masks break and they become vulnerable like normal Greed.
Floaters
Floaters are flying enemies that completely ignore your walls.
They swoop down and target your subjects, knocking tools from their hands and attempting to carry them away.
Archers in towers are particularly vulnerable because Floaters often target them.
Breeders
Breeders are among the most dangerous enemies in the game.
They have a huge amount of health, hit extremely hard, and periodically spawn additional Greed to support them.
They can also pick up catapult rocks and throw them back at your defenses.
Unlike regular Greed, Breeders cannot be bribed.
Crownstealers
Crownstealers are extremely dangerous late-game enemies.
They ignore your subjects and go directly after the monarch.
They are incredibly fast and can jump over walls.
If one reaches you, it can knock your crown off immediately.
The safest strategy is to stay behind your defenses and let your troops deal with them.
Portals
Portals are the main spawn points for the Greed.
During the day, they are generally closed and can be passed safely.
At night, they open and release enemies.
You can eventually order your knights or squires to attack and destroy them.
However, destroying a portal triggers a blood moon, so you need to be prepared before attacking one.
Dock Portals
Dock portals appear on the dock side of islands.
They are much stronger than normal portals and have a dangerous tentacle attack.
Destroying one allows you to build a lighthouse on that island.
Cliff Portals
Cliff portals are the ultimate threat on an island.
They have a huge amount of health and can rebuild themselves after being destroyed.
Eventually, you can permanently destroy a cliff portal using the appropriate late-game strategy.
The Boat
The boat is how you travel between islands.
You first need to find the shipwreck and pay 10 coins to create its frame.
You then pay additional coins to spawn boat parts, which your workers gradually use to rebuild the boat.
Once the boat is complete, you can launch it and use the wharf bell to send subjects aboard.
When you are ready to leave, the active monarchs need to stand at the boat dock and pay 10 coins to set sail.
Your coins and gems travel with you to the next island, so I recommend filling your bag before leaving.
Mines
Mines permanently unlock new building ages.
Stone Mine
The Stone Mine is found on Island 2 and costs 10 coins.
It unlocks stone-age construction and allows you to access important upgrades such as spears, catapults, and squires.
Iron Mine
The Iron Mine is found on Island 4 and costs 20 coins.
It unlocks the iron age, including the Forge and Iron Castle.
Iron is especially important because it gives you access to knights and the bomb used against the cliff portal.
Walls
Walls are your first line of defense.
They slow down the Greed and give your archers time to eliminate them.
Wall Tiers
| Tier | Wall | Cost |
|---|---|---|
| Tier 1 | Barricade | 1 coin |
| Tier 2 | Wood Wall | 3 coins |
| Tier 3 | Stone Wall | 5 coins |
| Tier 4 | Castle Wall | 8 coins |
| Tier 5 | Iron Wall | 12 coins |
As you progress through the game, you should upgrade your important outer walls rather than relying on basic wooden defenses.
Towers
Towers give your archers a height advantage and make them much safer from ground enemies.
Tower Tiers
| Tier | Tower | Cost |
|---|---|---|
| Tier 1 | Raised Platform | 3 coins |
| Tier 2 | Watchtower | 6 coins |
| Tier 3 | Defense Tower | 9 coins |
| Tier 4 | Castle Tower | 12 coins |
| Tier 5 | Fortified Tower | 15 coins |
| Tier 6 | Iron Tower | 18 coins |
Higher-level towers can hold more archers and provide better protection.
The Iron Tower can hold four archers and protects them from Floaters, making it one of the strongest defensive structures in the game.
Farms
Farms provide a reliable source of income through farmers.
There are two main farm upgrades.
Day Farm
The Day Farm costs 3 coins.
Farmers return to your kingdom every night and walk back to the farm in the morning.
Farmhouse
The Farmhouse costs 8 coins.
Farmers can remain at the farm during the night, meaning they don’t need to travel back and forth every day.
This gives them more time to grow crops and generate coins.
Teleporters
Teleporters provide a fast way to travel around an island.
Once you destroy a portal, you can build a teleporter at its remains for 8 coins.
Using a teleporter costs 2 coins and allows you to select another location on the island.
You can also build a second connected teleporter, allowing you to travel between the two locations whenever you want.
Hermits
Hermits are special NPCs that allow you to transform certain buildings into unique structures.
Hermit of Tide
Found on Island 1.
It can turn higher-tier towers into Mighty Ballistas, which are powerful defensive weapons.
Hermit of Stable
Found on Island 2.
It can turn Tier 2 farms into Stables, allowing you to store and switch between mounts.
Hermit of Baking
Found on Island 3.
It can turn high-tier towers into Bakeries, which attract vagrants and make recruiting new subjects easier.
Hermit of Valor
Found on Island 4.
It can turn high-tier towers into Armories, giving you another location to purchase shields and recruit additional squires.
Hermit of Horns
Found on Island 5.
It can turn high-tier walls into Rally Walls, allowing you to call troops toward a particular side of your kingdom.
Statues
Statues provide powerful long-term bonuses.
Statue of Archery
This statue improves your archers’ accuracy and is one of the most useful statues to activate.
Statue of Sithe
This statue increases the number of farmers that can create crop fields around a farm.
Statue of Building
This statue increases the maximum health of your walls.
Statue of Knights
This gives knights a powerful lunge attack.
However, I would be careful with this one because the aggressive behavior can also put your knights at greater risk.
Best Mounts
Mounts are extremely useful because they allow you to travel around islands faster and provide unique abilities.
The general ranking from the supplied guide is:
| Tier | Mount |
|---|---|
| S Tier | Griffon |
| A Tier | Stag, Wild Horse |
| B Tier | Lizard, War Horse |
| C Tier | Unicorn |
| F Tier | Great Bear, Default Horse |
Griffon – S Tier
The Griffon is my favorite overall mount.
It can obtain a stamina boost on almost any terrain and can also push back and stun enemies with its special ability.
It is fast, flexible, and useful throughout the game.
If you want one mount that can handle almost everything, the Griffon is the one I would prioritize.
Stag – A Tier
The Stag is excellent in forest areas.
Its biggest advantage is that it can attract deer and lead them back toward your archers.
This makes hunting much easier and can provide a reliable source of coins.
Its major weakness is winter because there are no deer to attract and fewer opportunities to graze.
Wild Horse – A Tier
The Wild Horse doesn’t have a special attack, but it has excellent stamina.
It can run for a long time and maintain its mobility even when other mounts begin struggling.
It is also a strong choice when preparing for dangerous areas such as the cliff portal.
War Horse – B Tier
The War Horse has a useful ability that buffs nearby troops when you begin running.
The affected troops become temporarily immune to enemy damage, which can completely change the outcome of a difficult fight.
Lizard – B Tier
The Lizard, or dragon, has excellent speed, particularly in forests.
It can breathe fire and create fire traps that damage enemies walking through them.
Its main weakness is its low stamina, so you need to use its abilities carefully.
Great Bear – F Tier
The Great Bear can attack animals while running and can technically fight the Greed.
However, its stamina is extremely poor.
Because of this, I wouldn’t recommend using it unless you specifically want to experiment with its unique ability.
Unicorn – C Tier
The Unicorn can produce three coins after grazing on grass.
This gives it a useful money-making ability, but outside of that it is fairly similar to the standard horse.
If you are starting a new Kingdom Two Crowns save, I would focus on a few things above everything else.
First, build your economy. Recruit vagrants, buy bows and hammers, and get your archers hunting as quickly as possible.
Second, don’t expand too aggressively. Clearing too much forest can remove useful resources such as deer, vagrant camps, and the Merchant’s hut.
Third, always prepare for the night. It is much better to spend the daytime upgrading your walls and towers than to discover at night that your kingdom isn’t ready.
Fourth, save your gems and use them carefully. There is a limited supply, so don’t waste them on something you don’t actually need.
Finally, learn when to leave an island. You don’t have to completely destroy everything before moving on. Building a strong economy, unlocking important upgrades, and keeping your kingdom alive should always be your main priorities.
Kingdom Two Crowns becomes much easier once you understand how the economy, defenses, and enemy waves work together. Start small, protect your kingdom, upgrade your technology, and gradually expand across the islands.