
In Clicky Islands, artifacts are essential as they transform how clicking functions, boost unit effectiveness, and enhance resource production. You’ve got 45 artifacts to explore, each with unique interactions and subtle limitations that can catch you off guard. Knowing how these work can drastically improve your gameplay and resource management.
Throughout my time playing, I noticed that beginners often overlook certain synergies between artifacts, leading to wasted resources and missed opportunities. Being aware of these details can make a big difference in how quickly you progress in the game. So, dive in and familiarize yourself with these artifacts!
Before diving into the specifics, check your inventory for any click-based or unit-based artifacts that can be equipped early on to give you an advantage in the initial stage of the game. It’s crucial to maximize the use of these artifacts right from the start.
Artifacts Guide: All 45 Artifacts and Effects
I’ve organized the artifacts into four critical categories: click-based, unit-based, production-based, and miscellaneous. Each image illustrates the artifact, while my detailed notes highlight often-missed interactions.
Click-based Artifacts
These artifacts primarily influence the effects triggered by clicking resources or buildings, detailing how autoclicking can interact with various outcomes.
Click bonuses and extra resources

I’ve discovered that this bonus applies to any clickable entity, including buildings. It’s interesting to note that while Ruins don’t sound off or show an icon, they still receive bonuses when you roll a 6 on your click.
The extra damage you obtain is factored into your click strength, effectively amplifying your resource clicks.
This effect extends to all clickable resources, buildings, and even the campfire, providing a comprehensive advantage in action.
Also, clicking the Fisherman’s Hut counts toward this bonus, allowing you to collect a range of resources, including Wood, Stone, Clay, Cider, Gold Apple, Iron Ring, and Pearl.
It’s worth noting that shifting your island’s stage doesn’t affect the resources available through this bonus.
Autoclicking and golden resources
Autoclicking contributes to this artifact as well, providing coverage for clickable resources, buildings, and Ruins.
However, transforming a resource into gold requires a manual click. Just keep in mind, a gold resource needs a road connection before you can assign a unit to it.
Only gold resources can be set for autoclicking, excluding Ruins and Treasure Chests, which cannot be converted to gold. You can turn the Fisherman’s Hut gold and then demolish it; however, Fishing Spots cannot be turned gold or autoclicked.
Apiaries are eligible for turning gold, and you can demolish them to maintain an empty tile afterward. This seems like a possible oversight in the design.
Cats, Pals, and Golems
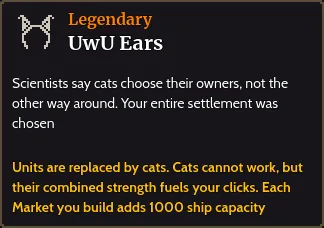
This effect enables Pals to become tameable cats, while Golems retain their original form and can still be assigned tasks.
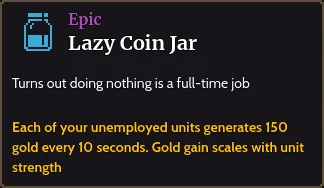
The Lazy Coin Jar has been helpful, generating gold from some of my starting cats, although not all. Since cats can’t be assigned like regular units, the All-Seeing Crown won’t benefit them. Interestingly, the Brain Eating Parasite stacks with this effect, yet the cats remain unassignable.
Unit-based Artifacts
These artifacts are designed to improve how units handle movement, labor, and their interactions with houses and other units.
Unit movement and work speed
Using these specialized boots, units can traverse an entire island in about 10 seconds—much faster than their usual pace.
I noticed a boost to work speed when hovering my cursor over units. This speed increase lingers for about 8 seconds even after moving the cursor away.
However, the Heavy Signet Ring doesn’t trigger this effect. The boost only applies to the tile directly under my cursor.
This modifier grants me one additional Golem at the start of an island, but keep in mind it doesn’t upgrade any of the Golems’ existing stats. I misunderstood this initially.
Housing and comfort bonuses
Comfort enhances the time and food required to spawn units and bolsters their strength. To gain this benefit, my houses must be interconnected to the road.
Only houses that sit directly above, below, or beside each other count; diagonal corners do not contribute. Interestingly, I only receive the +2 bonus once per house, even if it touches multiple others.
It’s the same for this effect; diagonal corners remain uncounted. You only earn the +1 bonus from each house once, regardless of adjacency to others.
There’s a minimum Comfort value I cannot dip below. The bonuses appear to decrease with each pair of adjacent houses, depending on the number overall.
As with previous effects, only direct neighbors contribute; diagonal arrangements don’t count here either.
Pals and automatic assignment
Pals operate at the same effectiveness as standard units but do not benefit from the doubled strength offered to Golems.
With this effect, units assign themselves, though I still need roads set up. In my experience, they don’t change assignments frequently.
Pals benefit from the bonuses and can gain doubled effectiveness, but I cannot assign them like normal units. Golems aren’t affected by this doubling, but can be assigned as usual. The All-Seeing Crown continues to enhance normal units.
Production-based Artifacts
For these artifacts, I focus primarily on aspects affecting resource yields, building costs, and the interplay between nearby tiles.
Berry production and building costs
A Large Berry Bush provides 2 Berries compared to just 1 from a standard Berry Bush.

I can erect up to six buildings without incurring costs, even if I demolish and rebuild them multiple times. Costs kick in only when I attempt to place the seventh building.
Trees, apples, and nearby buildings
In my observations, the wood yields are: 1 Wood from a Normal Tree, 1.5 Wood from a Large Tree, and 2 Wood from a Hard Tree.
Also, I cannot substitute Golden Apples for regular Apples—they don’t function for farms or products that require Apples, and I’m limited to selling them.
For this artifact’s effect, diagonal corners do count, and you can stack the bonuses effectively.
Treasure chest spawning
The X markers for spawned Treasure Chests can show up a tile or two inland rather than immediately by the water’s edge. It’s crucial to note that I don’t need to collect previous chests before new ones can appear; the spawning continues even after ten chests are accumulated.
Miscellaneous Artifacts
This category encompasses starting bonuses, map effects, monster interactions, and the challenges that come with the volcano.
Other artifact effects and starting bonuses
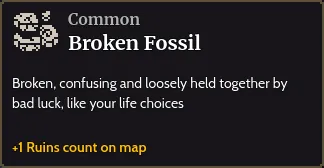
Even with activated effects, I can’t exceed the limit of 10 artifacts.
The starting resources collectively amount to 3,000 total, including resources like Wood, Planks, Rope, and Straw.
This effect slightly enhances your range by increasing the radius by 1 tile.
This will reveal the coastline, but it doesn’t extend the visibility boundary along the mountains.
Monster nests and volcano challenges
Monsters are continuously spawned from Nests, and their attacks can momentarily stun my units, rendering them unable to work or be assigned tasks.
Tower buildings target nearby monsters, which will drop gold upon being defeated. Players can’t kill these monsters through clicking; only Towers can do so.
It’s possible to assign units to destroy a Nest, and taking one out yields a Fossil while boosting click strength and unit strength.
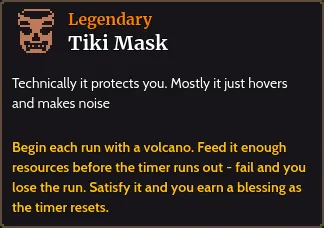
I can see a countdown bar at the bottom of the screen displaying my time—up to 10 minutes to fill the volcano, with each successful attempt restoring up to 3 minutes.
The initial filling requires 2,000 resources, with that requirement doubling for every subsequent fill. Each success also grants a blessing.
If I don’t succeed, I’m shown the island-leaving summary, but I retain any Fossils and Reputation I’ve gained thus far.